
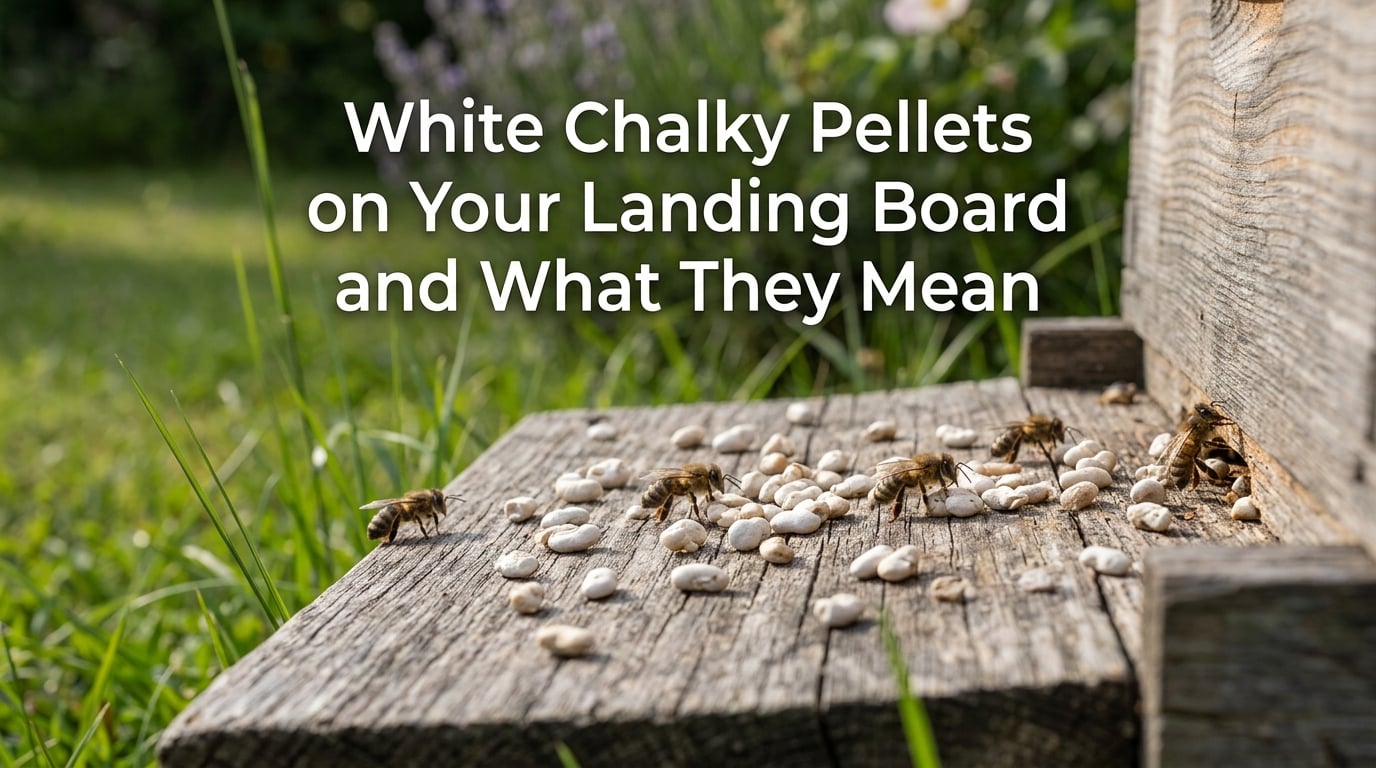
If you have spotted white chalky pellets on your landing board this season, you are looking at one of the most recognizable signs of trouble in a honey bee colony. Those small, chalk-white lumps are called chalkbrood mummies, and they are the hardened remains of bee larvae killed by a fungal infection. The good news is that chalkbrood rarely destroys a colony on its own. The better news is that with the right management steps, most hives recover fully.
I have helped beekeepers work through chalkbrood outbreaks for years, and the pattern is always the same. A beekeeper spots something odd near the entrance, panics a little, and then wonders whether the hive is doomed. It almost never is. This guide walks through everything you need to know about white chalky pellets on your landing board, from what they are to how to treat and prevent them.
We will cover what chalkbrood disease is, how to identify it, how the infection takes hold, how to tell it apart from other brood diseases, and the exact steps our team recommends for treatment and prevention.
Table of Contents
What Are White Chalky Pellets on Your Landing Board?
White chalky pellets on your landing board are chalkbrood mummies, the dried and hardened remains of honey bee larvae killed by the fungus Ascosphaera apis. When a larva dies from this infection, the fungal threads consume its body from the inside out and turn it into a firm, chalk-like mass. Worker bees then carry these mummies out of the hive and drop them on the landing board or the ground near the entrance.
Chalkbrood is a fungal brood disease, meaning it targets the developing bee larvae rather than adult bees. The fungus Ascosphaera apis is found worldwide and thrives in conditions where the brood nest is cool and damp. It does not infect humans or other animals, so there is no risk to you when handling mummies.
One important detail that catches beekeepers off guard: chalkbrood rarely kills an entire colony. Our team has seen hives push through significant outbreaks with nothing more than improved ventilation and a strong nectar flow. However, it does weaken the colony, reduce honey yields, and make the hive more vulnerable to other problems if left unmanaged.
The pellets themselves range in size from a grain of rice to a small jellybean, depending on the age of the larva when it died. Fresh mummies are pure white and feel like a piece of chalk between your fingers. As they age, they darken to gray and eventually black.
How to Identify Chalkbrood Mummies
Chalkbrood mummies are easy to identify once you know what to look for. The most obvious sign is white, chalk-like pellets clustered on the landing board, stuck to the entrance reducer, or scattered on the ground in front of the hive. You may also find mummies inside the hive on the bottom board or still sitting in their brood cells.
The color progression tells you a lot about what stage the infection is in. Fresh mummies are bright white because they are covered in cottony fungal growth called mycelium. Over several days, the fungus produces spore-bearing structures that turn the mummy gray. Eventually, a fully sporulated mummy becomes dark gray or nearly black.
Here is a practical test experienced beekeepers use: pick up a suspected mummy and squeeze it gently. A chalkbrood mummy will feel hard and dry, almost like a piece of sidewalk chalk. It holds its shape and does not smear. If the pellet is soft, wet, or has a ropiness to it, you may be dealing with a different brood disease.
Another identification technique is the shake test. Pull a frame from the brood nest and give it a gentle shake near your ear. Chalkbrood mummies trapped in their cells will rattle loosely inside the comb. This rattling sound is distinctive and something I have used many times to confirm a diagnosis quickly.
Inside the brood nest, look for a scattered or peppered brood pattern. Instead of a solid wall of capped cells, you will see gaps where larvae died and were removed or mummified in place. You may also spot cells with perforated or sunken cappings where worker bees have started to open and clean out dead larvae.
How Chalkbrood Infection Happens
Chalkbrood infection starts when nurse bees feed larval food contaminated with Ascosphaera apis spores to young larvae. The spores pass into the larval gut along with the food. Once inside, the spores germinate and begin producing thread-like filaments called hyphae.
These hyphae grow through the larval gut wall and spread throughout the body, absorbing nutrients from the living larva. The larva typically dies after the cell has been capped, which is why mummies are most often found under sealed cappings. Once the larva dies, the fungus continues to grow and eventually covers the entire body in a white cottony mat of mycelium.
The fungus then dries out the larval remains, turning them into those hard chalk-like pellets. The entire process from infection to mummification takes about two to three weeks. Worker bees eventually detect the dead larva, uncap the cell, and carry the mummy out of the hive.
Several conditions make chalkbrood more likely to take hold. The fungus grows best at temperatures around 86 degrees Fahrenheit, which is below the normal brood nest temperature of about 95 degrees. This means anything that chills the brood, such as a small colony in a large hive, poor ventilation, or cold snaps in late spring, creates an opening for infection.
Late spring is the highest-risk period for chalkbrood, and our team sees the most questions about white chalky pellets during this window. Colonies are building rapidly, but nighttime temperatures can still drop. If a colony expands faster than its population can keep the brood warm, chalkbrood often follows.
Excess moisture inside the hive also promotes fungal growth. Poor ventilation traps humid air from the bees’ respiration and from evaporating nectar, creating the damp conditions the fungus loves. Colonies under nutritional stress, dealing with mite pressure, or otherwise weakened are also far more susceptible.
Chalkbrood vs Other Brood Diseases
Telling chalkbrood apart from other brood diseases matters because the treatments are completely different. Misidentifying chalkbrood as American foulbrood, for example, can lead to unnecessary destruction of perfectly recoverable equipment. Here is how to distinguish the four most common brood problems beekeepers encounter.
Chalkbrood vs American Foulbrood (AFB): AFB produces a characteristic foul odor and a ropy, sticky texture when you stir a toothpick into a dead larva. The dead larvae flatten against the bottom of the cell in a brown, paste-like scale that sticks tightly to the cell wall. Chalkbrood mummies, by contrast, are dry, hard, chalky masses that come out of the cell easily and have no foul smell. AFB is a devastating bacterial infection requiring mandatory reporting and equipment destruction in many areas. Chalkbrood is manageable.
Chalkbrood vs European Foulbrood (EFB): EFB is a bacterial infection that kills larvae before they are capped, leaving twisted, yellow-brown larvae in open cells. The dead larvae appear melted and greasy rather than hardened and chalky. EFB often has a sour smell. Chalkbrood kills larvae after capping and produces solid mummies that retain a larval shape.
Chalkbrood vs Sacbrood: Sacbrood is a viral disease that kills capped larvae and turns them into a sac-like structure filled with fluid. When you remove a sacbrood larva from its cell, it looks like a small water balloon that ruptures easily. The color ranges from gray to dark brown, and the remains have a gondola or slipper shape. Chalkbrood mummies are dry, hard, and hold their shape when handled.
Chalkbrood vs Chilled Brood: Chilled brood occurs when cold temperatures kill developing larvae. The dead larvae are gray-brown and watery but do not harden into chalky mummies. There is no fungal growth on the remains. Chilled brood is an environmental problem, not an infectious disease, though it can open the door for chalkbrood to follow.
If you are ever uncertain about what you are seeing, the toothpick test is your friend. Stir a dead larva gently. If it ropes and smells foul, think AFB. If it is a liquid sac, think sacbrood. If it is a dry, hard pellet that rattles in the cell, you are dealing with chalkbrood.
Treatment and Management Strategies
The first thing to understand about chalkbrood treatment is that there is no chemical cure registered for it in most countries. No antibiotic or fungicide will eliminate Ascosphaera apis from your hive. Instead, management focuses on changing the conditions that allowed the fungus to thrive and helping the colony clean itself up.
Step 1: Decide whether to intervene. Many mild chalkbrood cases resolve on their own when warm summer weather arrives. Our team has seen this play out repeatedly, as experienced beekeepers on forums consistently report that colonies bounce back as temperatures rise. If you are finding fewer than a dozen mummies per inspection and the colony is otherwise strong and active, patience may be the best approach.
However, if mummies are abundant, the brood pattern is severely scattered, or the colony seems weak, it is time to take action.
Step 2: Improve ventilation immediately. This is the single most effective intervention for chalkbrood. Open the entrance reducer to its full width or remove it entirely during warm weather. Prop the inner cover slightly with a small stick or shim to increase airflow through the top of the hive. If you use a screened bottom board, make sure it is open and not blocked.
Tilt the hive forward by a degree or two so condensation runs out the entrance rather than dripping back onto the bees. Some beekeepers add a small upper entrance to create a through-flow of air, which dramatically reduces humidity inside the brood nest.
Step 3: Reduce excess space. If the colony is small relative to the hive volume, remove empty supers and consolidate the bees into a smaller space. A small colony cannot maintain proper brood nest temperature in a large box, and chilled brood creates the perfect conditions for chalkbrood.
Step 4: Feed and support the colony. Well-fed colonies manage chalkbrood far better than nutritionally stressed ones. If there is no nectar flow, feed syrup and pollen substitute to keep the colony strong. A colony with adequate nutrition can rear healthy replacement brood faster than the fungus can kill it.
Step 5: Remove mummies manually. Scrape mummies off the bottom board and clean the landing board regularly. Some beekeepers go through affected frames and physically remove mummies from cells using a pair of tweezers or a small hook. This reduces the spore load inside the hive and speeds up recovery.
Step 6: Consider queen replacement. If a colony has persistent chalkbrood that does not respond to management changes, replacing the queen with one bred from hygienic stock can make a dramatic difference. Hygienic bees have a genetic trait that makes them faster at detecting and removing diseased larvae before the fungus can sporulate. Many queen breeders now select specifically for this trait.
Step 7: Sterilize equipment carefully. Reusing frames from affected hives is often fine if you clean them properly, according to experienced beekeepers on the Honey Flow forum. Scrape propolis and wax from woodenware, then scorch the surfaces with a propane torch to kill spores. For plastic frames, soak in a bleach solution. Chalkbrood spores are tough, but proper cleaning makes equipment safe to reuse.
Do not expect overnight results. Chalkbrood recovery typically takes several weeks as the colony cycles out infected brood and replaces it with healthy larvae. Most colonies show clear improvement within four to six weeks of implementing these management changes.
Preventing Chalkbrood in Your Apiary
Prevention comes down to keeping colonies strong, warm, dry, and well-fed. These sound simple, but they are the foundation of every successful chalkbrood prevention strategy.
Maintain strong colonies by avoiding over-splitting in spring. A split that is too small to keep its brood warm is an open invitation for chalkbrood. When making splits, ensure each new colony has enough bees to cover the brood nest completely, even on cool nights.
Prioritize ventilation year-round, not just when you see a problem. Use screened bottom boards, provide upper entrances during the foraging season, and avoid wrapping hives too tightly in winter if you live in a damp climate. Moisture is a bigger threat than cold in most regions.
Feed colonies during dearths to prevent nutritional stress. A protein shortage hits brood rearing hard and weakens the colony’s ability to fight off fungal infections. Pollen substitute patties during late summer and early fall can keep brood production strong going into winter.
Choose hygienic queens when ordering or breeding. Many commercial queen producers now test for and select hygienic behavior, and the investment pays off in disease resistance across your entire apiary. Hygienic bees remove chalkbrood-infected larvae before mummies even form, breaking the infection cycle entirely.
One sobering fact to keep in mind: chalkbrood spores can survive for 15 years or more on old comb and equipment. This means that once chalkbrood enters your apiary, the spores are there for the long haul. The goal is not to eliminate spores but to keep colonies strong enough that the spores never get a foothold. Regular comb replacement, cycling out old dark brood frames every three to four years, helps reduce the spore load in your hives.
Practice apiary-level biosecurity if you run multiple hives. Avoid sharing equipment between hives without cleaning it first. When working a hive with chalkbrood, finish it last in your inspection route so you do not carry spores to healthy colonies on your hive tool or gloves.
FAQs
What are the little white pellets in my house?
If you are a beekeeper, those white pellets near your home may be chalkbrood mummies that worker bees have carried out of a nearby hive. They are the hardened, chalk-like remains of bee larvae killed by the fungus Ascosphaera apis. If you are not a beekeeper, small white pellets in the home are more likely to be termite frass, spider egg casings, or drywall debris, and you should investigate further.
What kills chalkbrood spores?
Chalkbrood spores are extremely resilient and can survive for 15 years or more on old comb and equipment. Heat from a propane torch will kill spores on wooden hive parts. A 10 percent bleach solution can disinfect plastic frames and tools. Irradiation is used commercially on a large scale. No registered chemical treatment inside the hive will reliably kill active spores, which is why prevention through colony strength and ventilation is the primary strategy.
What is the white stuff in bee hives?
The white stuff in bee hives is most commonly chalkbrood mummies caused by the fungus Ascosphaera apis. These are the dried, hardened remains of honey bee larvae that died from the infection. Less commonly, white fuzzy growth could be mold from excess moisture, or white crystalline deposits could be old crystallized honey. Chalkbrood mummies are hard, dry, and shaped like small larvae.
Is chalkbrood contagious?
Yes, chalkbrood is contagious between hives. Spores spread through contaminated equipment, drifting bees, robbing, and even on the beekeeper’s tools and gloves. The spores are incredibly long-lived. However, a strong, healthy colony with good ventilation and nutrition can resist infection even when spores are present, so contagion depends heavily on colony condition.
What do you do if a hive has chalkbrood?
If a hive has chalkbrood, start by improving ventilation: open the entrance, add an upper entrance, and tilt the hive forward for drainage. Remove excess empty space so the colony can keep brood warm. Feed syrup and pollen substitute to boost colony strength. Clean mummies from the bottom board regularly. For persistent cases, replace the queen with hygienic stock. Most colonies recover within four to six weeks with these management changes.
What White Chalky Pellets Mean for Your Colony Going Forward
White chalky pellets on your landing board mean your colony has chalkbrood, but that diagnosis is far from a death sentence. The fungus Ascosphaera apis is common, manageable, and something most experienced beekeepers deal with at some point in their apiary. What matters most is how you respond.
The pillars of recovery are straightforward: improve ventilation, strengthen the colony through feeding, reduce excess hive volume, clean out mummies, and consider a hygienic queen if the problem persists. These steps work because they address the root causes of chalkbrood, which are cool, damp conditions and colony stress, rather than trying to fight the spores directly.
Remember that spores can linger for 15 years or more. Your long-term strategy should focus on keeping colonies strong enough that those spores never gain a foothold. Regular comb replacement, good nutrition, proper ventilation, and hygienic genetics will carry your apiary through season after season.
If this is your first encounter with chalkbrood, take a breath and give your bees a chance. Our team has watched hundreds of colonies throw off chalkbrood with nothing more than better airflow and a warm stretch of weather. Trust the process, support the colony, and keep inspecting regularly. Those white chalky pellets will likely be gone before you know it.