
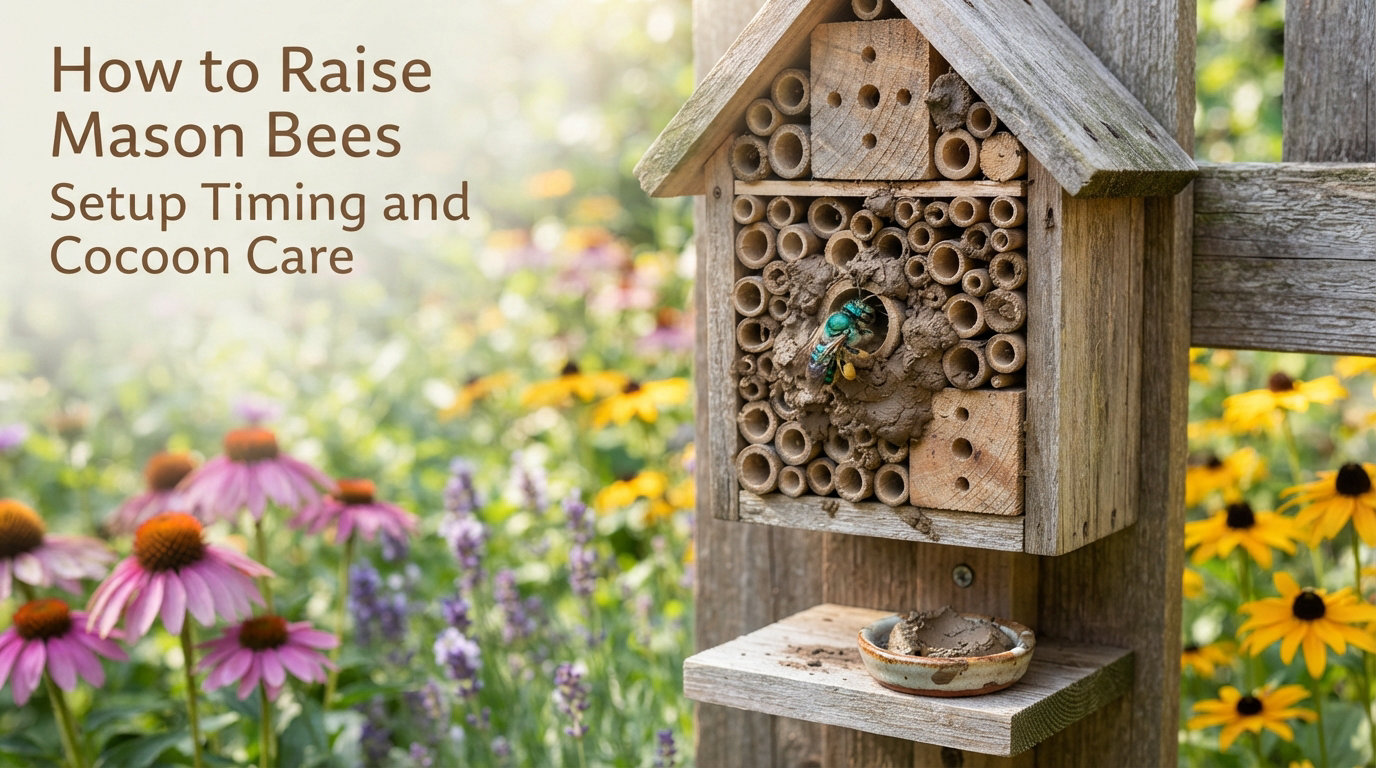
I still remember the first spring I tried to raise mason bees. I bought a decorative bamboo house, hung it from a tree branch, and waited. Nothing emerged. By July I had an expensive bird perch and a colony of parasitic wasps instead of pollinators.
That failure taught me something every beekeeping guide should say upfront: mason bees are forgiving, but only if you follow a few timing rules. Get the temperature threshold wrong or skip cocoon harvesting, and your colony collapses.
After five years of trial and error (and going from 5 cocoons to over 1500, just like one Reddit user reported), I put together this guide. It covers everything you need to raise mason bees successfully, from setting up the bee house to harvesting and storing cocoons through winter. I’ll explain the science behind the 55F emergence temperature, walk through harvesting step by step, and share the mistakes that killed my first colony so you don’t repeat them.
Whether you’re a backyard gardener with a single apple tree or managing a small home orchard, raising mason bees is the easiest way to boost spring pollination. They don’t need hives, they rarely sting, and they outperform honeybees dramatically. Here’s how to do it right.
Table of Contents
Mason Bees Are Solitary Cavity Nesters That Outperform Honeybees
Mason bees are solitary pollinators in the genus Osmia that nest in pre-existing cavities like hollow stems, wood tunnels, and reed tubes. The most common species raised in North America is Osmia lignaria, also called the blue orchard bee, known for its metallic blue-black body.
Unlike honeybees, mason bees live alone. Every female is a queen in her own right. She finds her own nest, gathers her own pollen, and lays her own eggs without help from workers or a hive. This solitary lifestyle makes them far easier to raise. There’s no smoker, no hive inspection, no swarm management.
What mason bees lack in honey production they more than make up for in pollination power. Research shows mason bees transfer pollen to roughly 95% of flowers they visit, compared to about 5% for honeybees. A single mason bee can pollinate what 100 honeybees accomplish. This makes them incredibly efficient for fruit trees, berries, and early spring blooms.
The two species most beginners encounter are Osmia lignaria lignaria (Eastern blue orchard bee) and Osmia lignaria propinqua (Western blue orchard bee). Both are native to North America. In Europe, the red mason bee (Osmia bicornis) is the equivalent species.
The Mason Bee Lifecycle Spans One Full Year From Egg to Adult
Understanding the mason bee lifecycle is the foundation for raising them well. These bees live approximately one full year, but you’re only actively managing them for a 4-6 week window each spring.
Stage 1: Emergence (Spring)
Adult mason bees emerge from their cocoons when daytime temperatures consistently reach 55F (13C). Males emerge first, followed by females a few days later. They mate almost immediately, and males typically die within 1-2 weeks. Females live about 4-6 weeks.
Stage 2: Nest Building and Pollination
Each female selects a tunnel, usually 6 inches deep with an 8mm diameter opening. She builds a mud wall at the back, then makes foraging trips to collect pollen and nectar. She forms this into a “pollen loaf” and lays a single egg on top. She then builds another mud wall to seal that cell and starts the next one.
A productive female fills 4-8 tubes in her lifetime, creating 6-10 cells per tube. This is when pollination happens, and it’s the only time you’ll see active bees.
Stage 3: Egg to Larva (Late Spring to Summer)
Eggs hatch within a few days. Larvae feed on the pollen loaf, growing rapidly through five instar stages. By mid-summer they enter the prepupal stage and spin a cocoon around themselves.
Stage 4: Hibernation (Fall through Winter)
Fully formed bees remain inside their cocoons through fall and winter. They enter a state of suspended development called diapause. They don’t need to eat, but they need consistent cold temperatures and proper humidity to survive until spring.
Set Up Your Bee House at Eye Level Facing Morning Sun
Bee house placement is the single most important setup decision. Get this wrong, and even healthy cocoons won’t produce a productive colony.
Height and Location
Mount your bee house between 5 and 7 feet off the ground. This height keeps it above most sprinkler splash, out of reach of curious pets, and visible enough that you’ll notice problems early. Face the openings toward the morning sun, ideally south or southeast.
Morning sun warms the cocoons and triggers emergence. Afternoon shade prevents the house from overheating in summer when developing larvae are vulnerable to extreme heat.
Direction and Protection
Make sure the entrance holes face away from prevailing winds. A wind break (fence, hedge, or wall) reduces stress on returning females carrying pollen. The bee house should also be protected from heavy rain. A small overhang above the holes prevents water from entering tunnels and drowning developing bees.
Nesting Material Choices
Choose nesting materials that allow you to harvest cocoons. This is non-negotiable for healthy colonies. Here are your main options:
Wood trays with removable cardboard liners: Best for beginners. The trays open like books, making cocoon harvesting simple. Look for trays with grooves about 8mm in diameter and 6 inches deep.
Natural reeds: Beautiful and effective, but harvesting requires splitting reeds open. Choose reeds sealed at the back end.
Bamboo tubes: Budget-friendly, but harvesting is destructive. The Xerces Society and most experienced keepers recommend avoiding bamboo because you can’t inspect for pests or clean effectively.
Paper tubes: Disposable and easy to replace but harder to inspect. Some commercial systems use these with success.
Based on forum reports from r/MasonBees and the Home Orchard Society, wood trays are the most popular choice because they allow complete inspection and cleaning.
Clay-Rich Mud Within 20 Feet Is Non-Negotiable
Here’s something most guides bury in the middle: mason bees cannot reproduce without access to mud. Female bees use mud to build cell walls and seal their nests. If there’s no mud source within 20 feet of the bee house, females will abandon the site entirely.
The mud must be clay-rich. Standard garden soil won’t hold together well enough. Clay content of at least 30% gives bees the workable material they need. If you have clay-heavy soil in your yard, you’re set. If not, you’ll need to create a mud source.
Creating a Mud Station
I built a simple mud station using a shallow terracotta dish filled with native clay soil mixed with water to a consistency similar to modeling clay. Keep it consistently moist throughout the active season. Check it every few days during dry spells.
Place the mud source in a sunny spot near the bee house. Bees prefer warm mud that’s easy to work. Some keepers report success with commercial clay-based products sold specifically for mason bees, but native clay soil works just as well and costs nothing.
Release Cocoons When Daytime Temperatures Hit 55F Consistently
The 55F emergence temperature is the most critical timing rule in mason beekeeping. This threshold isn’t arbitrary. It’s based on the bee’s biology: their metabolism requires sustained warmth to break diapause and complete adult development inside the cocoon.
Below 55F, bees stay dormant. Above 55F for several consecutive days, their internal processes accelerate. They consume energy reserves, complete development, and chew through the cocoon. If you release them too early when temperatures fluctuate around 50-54F, some will emerge successfully while others will exhaust their energy stores and die inside the cocoon.
How to Time Release
Wait until your local forecast shows daytime highs consistently at or above 55F for at least 5-7 days. This usually happens:
Pacific Northwest: Mid-March to early April
Northeast and Midwest: Mid-April to early May
Southeast: Late February to mid-March
California: February to March
Release males (smaller cocoons) 3-5 days before females if you’re sorting by gender. This gives males time to mature and ensures females have mates waiting when they emerge.
Release Method
Place cocoons in a small emergence box or open paper bag inside the bee house. Don’t scatter them on the ground. The bees need to crawl upward and find tunnel openings immediately after emerging. Position the cocoons within 12 inches of the nest tubes, but not inside them. Bees will naturally crawl toward the light and locate the tunnels.
Harvest Cocoons in October or November Before Winter Hits
Cocoon harvesting is what separates successful mason beekeepers from frustrated beginners. Skip this step, and you’ll face pest infestations, disease buildup, and dwindling populations within 2-3 years.
When to Harvest
Harvest cocoons in October or November, after bees have fully developed inside but before winter temperatures drop too low. In most regions, this means waiting until nighttime temperatures are consistently below 50F but above freezing.
Don’t wait too long. Bees in cocoons can handle cold, but freeze-thaw cycles damage them. Harvest before your first hard freeze.
How to Harvest
Remove nesting materials from the bee house. Bring them to a garage or shed where you have workspace and good light.
Open wood trays or split reeds. If using wood trays, carefully unstack them and pull back the cardboard liners. Cocoons should be visible in individual cells.
Extract cocoons gently. Use your fingers or soft tweezers. Healthy cocoons are firm, grayish-brown, and roughly rice-grain shaped. They should feel slightly springy.
Discard damaged cocoons. Any cocoon that’s crushed, moldy, or showing signs of parasitism should go in the trash, not your compost. Signs of trouble include small holes (Houdini fly exit holes), webbing (dermestid beetles), or chalky mummies (chalkbrood fungus).
Tools You’ll Need
Tweezers or small pliers
A bowl for healthy cocoons
A separate container for suspicious cocoons
Paper towels or newspaper for drying
Optional: A sifter or mesh strainer for cleaning
Clean Cocoons With Oxygen Bleach and Refrigerate at 35 to 40F
Cleaning cocoons removes pollen mites, fungal spores, and other pathogens that would otherwise multiply over winter and infect next year’s bees.
The Cleaning Process
Prepare a cleaning solution. Mix 1 tablespoon of oxygen bleach (sodium percarbonate) per quart of cool water. Never use chlorine bleach. It kills the bees.
Soak cocoons for 3-5 minutes. Place healthy cocoons in the solution and gently agitate. Pollen mites and debris will float loose.
Rinse thoroughly. Drain through a mesh strainer and rinse twice with clean cool water.
Dry completely. Spread cocoons on paper towels for 1-2 hours. They should feel dry to the touch before storage.
Winter Storage
Proper winter storage mimics the cool, humid conditions bees evolved with. Here’s the exact setup I use:
Container: A small cardboard box or paper bag. Avoid airtight plastic containers, which trap moisture and cause mold.
Temperature: 35 to 40F consistently. A standard refrigerator works perfectly. The crisper drawer is ideal.
Humidity: 60 to 70% relative humidity. If your fridge runs dry, place a barely damp paper towel in the container and check weekly.
Air circulation: Leave the container slightly open or poke small holes for airflow.
Check cocoons once a month. Remove any that show mold or damage immediately. One bad cocoon can infect the whole batch.
Store them in the back of the fridge, not the door. Temperature fluctuations from opening the door can trigger premature emergence attempts.
Watch for Houdini Flies Pollen Mites and Chalkbrood Fungus
Mason bees face three main pest and disease threats. Knowing what to look for saves colonies.
Houdini Flies
Houdini flies (Leucophora species) are mason bees’ worst parasite. Females sneak into occupied tunnels and lay eggs. Their larvae eat the bee larva and pollen loaf, then emerge from the cocoon as adult flies. Signs of Houdini fly damage include small exit holes in cocoons and discolored, shriveled contents.
Harvesting cocoons every year is the best prevention. It breaks the fly’s lifecycle. Removing and destroying infested cocoons prevents population buildup.
Pollen Mites
Pollen mites (Chaetodactylus krombeini) feed on the pollen loaf inside bee cells. Heavy infestations starve bee larvae. Infested cocoons may show yellowish mite clusters when opened. Oxygen bleach cleaning during harvest eliminates most mites.
Chalkbrood Fungus
Chalkbrood (Ascosphaera species) creates white, chalk-like mummies inside cocoons. Infected larvae die and turn hard and white. Prevent chalkbrood by keeping nesting materials dry. A bee house with good drainage and morning sun exposure rarely has chalkbrood problems.
Mason Bees Pollinate 95% of Flowers They Visit vs Honeybees at 5%
The comparison between mason bees and honeybees comes up constantly in forums. Here’s the honest breakdown:
| Feature | Mason Bees | Honeybees |
|---|---|---|
| Pollination efficiency per visit | 95% | 5% |
| Active season length | 4-6 weeks | Year-round (in warm climates) |
| Hive required | No | Yes |
| Stinging tendency | Extremely rare | Defensive of hive |
| Skill level needed | Beginner | Intermediate to advanced |
| Equipment investment | Minimal | Substantial |
| Honey production | None | Yes |
| Colony size | Solitary | 20,000 to 80,000 bees |
Mason bees aren’t a replacement for honeybees if you want honey or year-round pollination. But for spring fruit tree pollination and garden enhancement, they’re dramatically more effective with a fraction of the work.
Follow a Year-Round Care Calendar to Maximize Colony Success
Most guides give seasonal advice, but a monthly calendar makes it easier to stay on track. Here’s the schedule I follow:
January to February
Order cocoons if you need them. Source locally within your ecoregion when possible. Bees adapted to your climate emerge more reliably. Check stored cocoons monthly for mold or damage.
March
Continue monitoring stored cocoons. In warm regions, watch for early warm spells. Wait for consistent 55F days before release. Prepare your bee house and clean it if needed.
April to May
Release cocoons when conditions are right. Set out mud source. Monitor daily for emergence, mating activity, and nest building. Fill mud station as needed. Watch for predator activity (birds, ants).
June
Active season is winding down in most regions. Avoid disturbing nests. Leave nesting materials in place to let larvae develop undisturbed.
July to September
Don’t touch the nesting materials. Bees are developing inside cocoons. Disturbing them now can damage fragile larvae. Just check periodically for structural issues if your bee house is exposed.
October to November
Harvest cocoons. Clean and inspect each one. Sort healthy cocoons for storage. Discard damaged or parasitized cocoons. Begin winter storage setup.
December
Cocoons are in winter storage. Check humidity monthly. Plan next year’s garden enhancements and consider expanding your colony.
Avoid These Common Mistakes That Kill Mason Bee Colonies
I’ve made most of these mistakes. Here’s what not to do:
Mistake 1: Skipping Annual Harvesting
If you don’t harvest cocoons, pests and diseases compound year over year. A colony that thrives in year one can collapse by year three without intervention. Annual harvesting breaks pest cycles and lets you inspect each cocoon.
Mistake 2: Buying Bees in Unopened Tubes or Bamboo
You can’t inspect bees in sealed bamboo or cardboard tubes. Some suppliers sell dead or diseased cocoons. Buy from sources that let you see healthy, harvested cocoons or buy pre-harvested loose cocoons you can inspect.
Mistake 3: Releasing Too Early
Impatience kills colonies. Wait for consistent 55F days. Releasing during a warm spell in late winter followed by a cold snap wastes bee energy and kills many bees.
Mistake 4: Forgetting the Mud Source
No mud means no reproduction. Female bees will abandon your bee house for better real estate. Set out mud before bees emerge and keep it wet all season.
Mistake 5: Storing Cocoons in the Fridge Door
Temperature swings from door opening trigger premature emergence attempts. Always store cocoons in the main fridge compartment, ideally in the back where temperature is most stable.
Mistake 6: Using Airtight Storage Containers
Plastic containers with tight lids trap moisture. Mold kills cocoons. Use breathable containers like cardboard boxes or paper bags.
FAQs
How long does it take for mason bees to emerge from cocoons?
Once temperatures consistently reach 55F (13C), mason bees typically emerge within 7 to 14 days. Males emerge first, followed by females 2 to 5 days later. The actual emergence happens quickly once development completes, often within hours of the bee chewing through the cocoon.
How do you raise mason bees at home?
To raise mason bees at home, set up a bee house with removable nesting trays at eye level facing morning sun, provide a clay-rich mud source within 20 feet, release healthy cocoons when temperatures hit 55F in spring, and harvest cocoons each fall for cleaning and winter storage in your refrigerator.
How high should a mason bee house be placed?
Mount your mason bee house 5 to 7 feet off the ground, facing south or southeast for morning sun exposure. This height protects nests from ground predators and sprinkler splash while keeping them accessible for monitoring and harvesting.
How many mason bee cocoons do I need to start?
For a typical backyard with fruit trees, start with 20 to 30 cocoons for good genetic diversity and pollination coverage. A healthy colony can grow to several hundred cocoons within 2 to 3 years if conditions are right. Starting with fewer than 10 cocoons risks weak colony establishment.
Why are my mason bees not emerging from cocoons?
The most common reasons mason bees don’t emerge include releasing too early before consistent 55F temperatures, storing cocoons at incorrect temperatures (above 45F or below 32F), incorrect humidity during storage causing desiccation or mold, or purchasing dead cocoons from unreliable sources. Check your storage temperature and humidity, and ensure cocoons feel firm and slightly springy when gently squeezed.
Do mason bees sting?
Mason bees are extremely docile and rarely sting. They have stingers but almost never use them unless severely squeezed or trapped against skin. Most mason beekeepers work with their bees without any protective equipment. They are considered one of the safest pollinators for families and schools.
Start Raising Mason Bees This Season for Better Pollination
Raising mason bees is one of the highest-impact, lowest-effort ways to improve your garden’s productivity. They’re 95% efficient pollinators, they don’t need a hive, and they rarely sting. The only real requirements are a properly placed bee house, a reliable mud source, and a commitment to harvesting cocoons annually.
Start by ordering 20 to 30 healthy cocoons from a reputable source in your region. Set up your bee house in late winter, release cocoons when 55F days arrive consistently, and mark your calendar for October harvesting. Within 2-3 years you’ll have a self-sustaining colony of several hundred bees.
The investment is minimal. The pollination results are dramatic. And once you’ve tasted the difference mason bees make in your fruit tree harvest, you’ll never garden without them again.