
Every beekeeper remembers the first time they spotted their queen. That moment of recognition, spotting her longer abdomen among thousands of workers, feels like finding a needle in a buzzing haystack. Now imagine doing that same search every single inspection, across a dozen hives, never quite sure if the queen you are looking at is the same one from last month.
That is exactly the problem marking and clipping queens solves. In this guide, I will walk you through everything you need to know about marking and clipping queens, from the international color code system to the exact step-by-step techniques experienced beekeepers use. Whether you are managing two hives in your backyard or running a commercial apiary, these skills will transform how you work with your colonies.
You will learn why beekeepers mark queens with colored dots, why clipping one wing can save an entire swarm, and how to do both safely even if your hands are shaking on the first try. I have broken this down into clear sections so you can reference specific parts during beekeeping season.
Table of Contents
What Is Marking and Clipping Queens?
Marking and clipping queens are two separate but complementary techniques that beekeepers use to manage their colonies more effectively. Both involve briefly handling the queen during a routine inspection, and both serve distinct purposes.
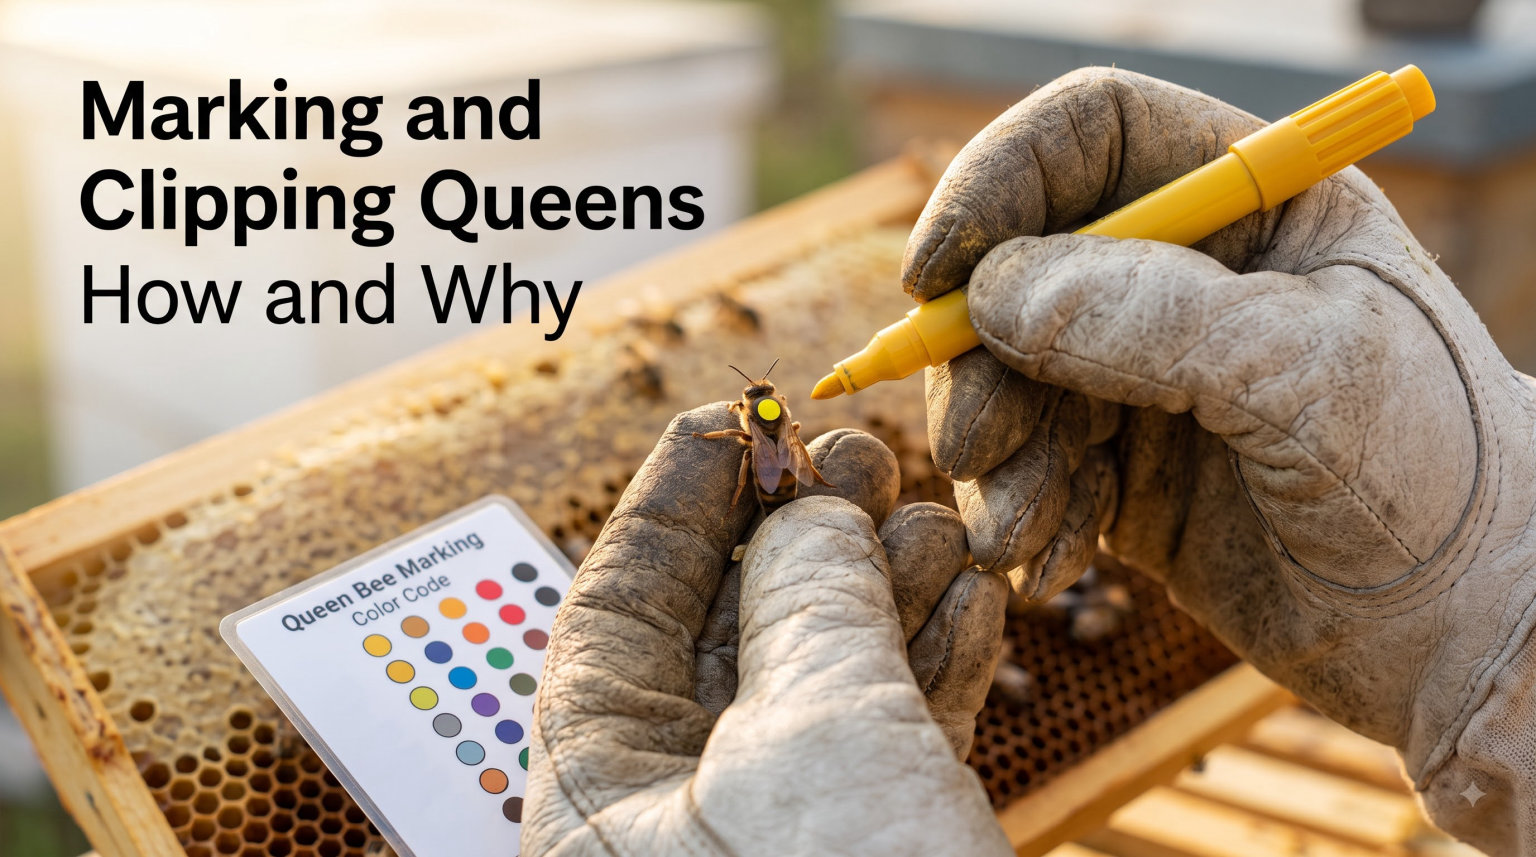
Queen marking is the practice of placing a small dot of non-toxic, brightly colored paint on the queen bee’s thorax, the middle section of her body between her head and abdomen. This colored dot makes her instantly recognizable during future inspections. Instead of scanning every frame for her distinctive shape, you simply look for the bright spot of color moving among the workers.
Queen clipping involves trimming about one-third off one of the queen’s two forewings using fine scissors. This does not prevent her from laying eggs or functioning normally inside the hive. What it does is prevent her from flying any meaningful distance if she leaves with a swarm, which makes the swarm much easier to catch and return to the hive.
Neither practice harms the queen when done correctly. Research has shown that marked and clipped queens continue laying at normal rates, and colonies with clipped queens show no difference in productivity compared to those without. The key is using proper technique, which I will cover in detail below.
Why Beekeepers Mark and Clip Their Queens
The reasons for marking and clipping queens go far beyond simple convenience. These practices address real management challenges that every beekeeper faces, especially during swarm season.
Marking a queen gives you several practical advantages:
- You can spot her in seconds instead of minutes during every inspection
- You can track her age by the color code on her thorax
- You can quickly tell if your colony has replaced her through supersedure (the old marked queen disappears, replaced by an unmarked one)
- You can confirm the queen is present without having to find her every single time, since freshly laid eggs confirm she was recently active
- You can track individual queens across multiple hives in a breeding program
Clipping a queen provides additional benefits that complement marking:
- A clipped queen cannot fly far, so when she leaves with a swarm, she typically lands on the ground or a low branch near the hive instead of disappearing into a tree 30 feet up
- You can catch the swarm easily and return it to the hive, often the same day
- A clipped wing tells you the approximate age of the queen if she was not marked, since clipping is usually done once per season
- Combined with marking, clipping gives you maximum control over your breeding and swarm management program
Together, marking and clipping queens form what many experienced beekeepers consider the foundation of good colony management. BIBBA (the Bee Improvement and Bee Breeders Association) recommends both practices as integral to a seasonal beekeeping program, particularly for beekeepers focused on selective breeding and swarm prevention.
The International Queen Color Code System
Beekeepers around the world follow a standardized color code system to indicate the year a queen was born. This system uses five colors that rotate on a five-year cycle, so you can determine a queen’s age at a glance simply by looking at the color dot on her thorax.
The international queen marking color code works like this:
- Years ending in 0 or 5: Blue
- Years ending in 1 or 6: White (or silver)
- Years ending in 2 or 7: Yellow
- Years ending in 3 or 8: Red
- Years ending in 4 or 9: Green
So for 2026, the correct marking color is white, since the year ends in a 6. Queens reared in 2026 should receive a white dot on their thorax. If you are reading this in a future year, simply check the last digit of 2026 and match it to the system above.
Many beekeepers use a simple mnemonic to remember the order. The most common version goes: “Will You Rear Good Bees”, where W stands for White, Y for Yellow, R for Red, G for Green, and B for Blue. Another popular version is “When You Really Got Bees.” Pick whichever sticks in your head.
One important note from the beekeeping forums: lighter colors like white, yellow, and green tend to be much easier to spot on a dark queen than red or blue. Some beekeepers even substitute pink or lime green for better visibility, though purists stick to the official system for consistency in breeding records.
The color code is optional, not mandatory. Some beekeepers simply use whatever color they find most visible. But if you follow the international system, you can walk up to any hive, see a blue dot, and immediately know that queen was born in a year ending in 0 or 5.
Equipment You Need for Marking and Clipping Queens
The equipment list for marking and clipping queens is surprisingly short. Most of these items are inexpensive and will last for years.
For marking, you need:
- Queen marking pen or paint: Posca paint pens are the most widely recommended option among beekeepers. They use water-based acrylic paint that dries quickly and is non-toxic to bees. Model paint (like Humbrol) also works well. Avoid oil-based paints, which can be harmful.
- A queen marking cage: This holds the queen still while you apply the paint. There are several types available, which I cover in the next section.
- Nitrile gloves: Thin nitrile gloves give you better dexterity than thick beekeeping gloves and reduce the risk of accidentally crushing the queen. They also keep paint off your fingers.
For clipping, you need:
- Fine, sharp scissors: Small scissors with fine pointed tips work best. Many beekeepers use dissection scissors, cuticle scissors, or specialized queen clipping scissors. The key is that they must be sharp enough to cut cleanly through the wing without pulling or tearing.
- A queen catcher or marking cage: You need to hold the queen gently but firmly while you clip the wing. The same cage used for marking works well.
Optional but helpful items include a soft sponge or cloth to rest the queen on if you are marking her by hand, and a magnifying lens if your eyesight makes it hard to see the wing clearly.
How to Find the Queen Before You Start
Before you can mark or clip a queen, you have to find her. This is often the hardest part for beginners, but a systematic approach makes it much easier.
Start with the brood nest. The queen spends most of her time on frames containing eggs and young larvae. Look for frames with freshly laid eggs standing upright in the cells. If you see eggs, the queen was there within the last three days.
Search in concentric circles. The Federation of Irish Beekeepers recommends a systematic approach: pull the outer frame first, check it, and set it aside in an empty nuc box or leaning against the hive. Then work frame by frame toward the center of the brood nest, holding each frame over the hive so the queen cannot fall into the grass if she walks off the comb.
Look for the retinue. Worker bees form a characteristic circle around the queen, facing toward her and attending to her. If you see a cluster of bees all facing inward in a tight ring, the queen is likely in the center of that group.
Watch for her movement pattern. The queen walks differently from workers. She has a longer abdomen and tends to move purposefully across the comb, often ducking under other bees. She rarely flies, even when exposed, and she tends to move away from light and toward dark, protected areas of the frame.
If the queen is hiding, check the bottom bars of the frames and the corners of the brood box. A hiding queen will often press herself flat against the wood. If she is running, do not chase her. Place the frame back in the hive gently and come back in 10 minutes when she has calmed down.
Inspecting on warm, sunny afternoons when many foragers are out of the hive also helps. A smaller worker population on the frames makes the queen easier to spot.
How to Hold the Queen Safely
Once you have found the queen, you need to hold her still without injuring her. There are three main methods, each with its own advantages.
Method 1: The plunger marking cage (press-in cage). This is a cylindrical tube with a soft foam or mesh plunger. You gently place the tube over the queen on the comb, then slowly press the plunger until it holds her gently against the mesh top. The slots in the mesh let you apply paint to her thorax through the cage. This method keeps the queen on the comb and minimizes handling, making it ideal for beginners.
Method 2: The crown of thorns cage. This is a shallow plastic ring with small spikes on the bottom edge. You press it gently over the queen to pin her in place on the comb. The spikes are blunt enough to hold her without injury. This is a traditional method that many older beekeepers prefer, though it requires a steady hand to avoid pressing too hard.
Method 3: By hand. Experienced beekeepers often pick the queen up gently by her thorax using their thumb and forefinger, or by both wings on one side. This gives maximum control and is the fastest method once you are confident. However, never grab the queen by the abdomen, as this can damage her reproductive organs. If you pick her up by the wings, support her body so she is not dangling by the wing joints.
The turn-and-mark cage is another variation. You catch the queen in a tube, then gently rotate the tube so her thorax is positioned against a mesh slot, allowing you to apply paint. Some beekeepers find this easier than a plunger cage because it avoids any downward pressure on the queen’s body.
Whichever method you choose, practice on drones first. Drones do not sting, and they are more robust than queens. If you can handle a drone confidently, you are ready for the queen.
How to Mark a Queen Bee: Step by Step
Here is the step-by-step marking process that I recommend for beginners and experienced beekeepers alike. Follow these steps carefully, and do not rush.
Step 1: Gather your equipment. Have your marking pen ready and tested on a piece of paper. Shake the pen well if using a Posca pen, and press the tip down on scrap paper until the paint flows. The paint should come out as a clean dot, not a splatter.
Step 2: Find and isolate the queen. Use the systematic search method described above. Once you have her on a frame, hold the frame over the hive to prevent her from falling.
Step 3: Secure the queen. Using your chosen method (plunger cage, crown of thorns, or by hand), gently immobilize the queen. If using a cage, position it so her thorax is accessible through the mesh slots.
Step 4: Apply the paint dot. Place a small dot of paint on the center of her thorax, right behind her head. The dot should be roughly 2 to 3 millimeters across. Use the correct international color for the year. Do not get paint on her wings, eyes, antennae, or abdomen, as this can interfere with her ability to function.
Step 5: Let the paint dry. Hold the queen still for 30 to 60 seconds while the paint dries. If you release her too soon, the paint may smear or get on other bees, which defeats the purpose. Posca paint dries quickly, usually within 30 seconds.
Step 6: Release the queen. Gently release her back onto the comb, preferably on a frame with eggs or young larvae where she was working before. Watch her walk down between the cells to confirm she is moving normally before closing the hive.
One common tip from experienced beekeepers: apply the paint in a thin layer rather than a thick glob. A thick glob of paint can flake off over time, while a thin layer bonds to the thorax and lasts the queen’s entire lifespan.
How to Clip a Queen’s Wings: Step by Step
Clipping the queen’s wings requires a steady hand and sharp scissors. Here is the procedure I recommend.
Step 1: Mark the queen first. If you plan to both mark and clip, always mark first. This way, if the queen becomes agitated after marking and you need to put her back, she is at least marked. You can clip on a separate inspection day if needed.
Step 2: Catch and hold the queen. Use your marking cage or catch her gently by the thorax with your thumb and forefinger. Support her body fully so she is not hanging by her wings. She should be calm and still before you attempt to clip.
Step 3: Identify the correct wing. The queen has two pairs of wings. The larger front pair (forewings) is what you clip. Choose one forewing, not both. Clipping one wing creates an asymmetry that prevents controlled flight. Clipping both wings looks more severe and offers no additional benefit.
Step 4: Cut one-third off the forewing. Using your sharp scissors, trim approximately one-third of the length off one forewing. You do not need to cut the entire wing off. Removing one-third is enough to make sustained flight impossible. Cut cleanly in a single motion rather than making multiple small snips.
Step 5: Release the queen. Place her gently back on the brood comb and watch her walk normally. She should move exactly as she did before the clipping. Confirm she has not been injured.
Important: Only clip one forewing, never both. Clipping one wing means the queen cannot fly in a balanced, coordinated way. If you clip both wings, she may still attempt to fly and could injure herself on landing. The asymmetry from a single clipped wing is what prevents her from leaving with a swarm and traveling any distance.
Some beekeepers prefer to clip the large forewing on the queen’s right side consistently, so that clipped colonies are always identifiable. Others alternate sides each year. There is no functional difference between left and right, so pick whichever side feels natural.
When to Mark and Clip Queens (Timing Matters)
Timing is an important factor in successful marking and clipping. The best time to mark and clip a queen depends on her life stage and the time of year.
The ideal time is early spring. Most experienced beekeepers mark and clip their queens during the first full inspection of the season, typically in March or April depending on your climate. At this point, the colony is active but not yet in full swarm mode, the queen is laying well, and the bee population is manageable. This is also the time when you are most likely to want swarm prevention.
Mark mated, laying queens, not virgins. A mated queen who is actively laying eggs is calm and relatively easy to handle. She is focused on egg-laying and rarely tries to fly. A virgin queen, by contrast, is programmed to fly out on mating flights. She is flighty, fast-moving, and likely to take off the moment you release her. Attempting to mark a virgin queen often results in her flying away, which can lead to her loss.
If you receive a queen in a cage (such as when buying a mated queen or installing a package), many beekeepers mark her before releasing her into the hive. The queen is already confined in the introduction cage, making her easy to access. Simply position the cage so her thorax is visible through the mesh and apply the paint dot. Let it dry fully before releasing her.
Avoid marking during dearth or cold snaps. If the colony is stressed by lack of nectar or cold weather, leave the queen alone. Handling the queen during stressful periods can disrupt the colony and set back brood production. Wait for a warm, calm day when the bees are relaxed.
If you are clipping for swarm control specifically, do it at least two to three weeks before your area’s typical swarm season. Clipping at the last minute, when the colony is already in swarm preparation, is less effective because the bees may have already decided to swarm regardless.
Common Mistakes and How to Avoid Them
Even experienced beekeepers make mistakes when marking and clipping queens. Here are the most common ones and how to prevent them.
Mistake 1: Using too much paint. A thick glob of paint on the thorax looks messy and can crack off over time. It can also run onto the queen’s head or wings if applied too heavily. Solution: use the smallest amount of paint that creates a visible dot. Practice on a piece of wood or a drone until you can produce a consistent 2-3 mm dot.
Mistake 2: Getting paint on the wrong body part. Paint on the queen’s eyes, antennae, wings, or abdomen can interfere with her ability to see, smell, fly, or lay eggs. Solution: always use a marking cage to control exactly where the paint goes, and position the queen so only her thorax is exposed through the mesh.
Mistake 3: Crushing the queen. This is every beekeeper’s nightmare. Applying too much pressure with a plunger cage or gripping too hard with your fingers can injure or kill the queen. Solution: use the lightest touch possible. If using a cage, the queen should be held gently against the mesh, not compressed. If holding by hand, grip the thorax firmly enough to control her but not so hard that you feel her exoskeleton flex.
Mistake 4: Clipping the wrong wing or cutting too much. Cutting both forewings or cutting into the wing base can injure the queen. Solution: always clip only one forewing, and only remove the outer third. Never cut near the wing base where it attaches to the body.
Mistake 5: Releasing the queen before the paint dries. Wet paint will smear onto the comb and other bees, and the mark will be faint or gone entirely. Solution: hold the queen for at least 30 seconds after applying paint. Posca paint dries fast, but give it the full time to be safe.
Mistake 6: Trying to handle a queen on a windy or cold day. Bees are more agitated in poor weather, and the queen is harder to control. Solution: pick a warm, calm day for marking and clipping. If conditions are wrong, wait.
Overcoming the Fear of Handling Queens
If the thought of picking up your queen makes your hands shake, you are not alone. Nearly every beekeeper feels apprehension the first few times. The fear of damaging the most important bee in the colony is natural and, in many ways, healthy. It means you respect the responsibility.
The single best way to build confidence is practice. Pick up drones first. Drones are larger, slower, and cannot sting. They are also expendable in a way the queen is not, so if you make a mistake, the consequences are minor. Practice catching a drone in your marking cage, applying paint to its thorax, and clipping a wing. Do this 10 or 20 times until the movements feel automatic.
From forum discussions, the consensus is clear: most beekeepers become comfortable with queen handling after their first successful marking. The anxiety drops sharply once you have done it once without incident. Start with a calm, mated queen on a warm day, use a marking cage rather than your bare hands, and take your time.
Remember that queens are tougher than they look. Their exoskeleton is designed to withstand the jostling of life inside a hive with 50,000 other bees. A gentle, careful marking or clipping will not harm her.
How Marking and Clipping Supports Selective Breeding
For beekeepers involved in bee improvement and selective breeding programs, marking and clipping queens are essential tools. BIBBA and similar organizations emphasize these practices as fundamental to tracking genetic lines over time.
Tracking queen age and longevity. By marking each queen with the year-appropriate color, you can track exactly how long she lives and how productive she remains over time. This data is invaluable for identifying colonies with long-lived, productive queens, which is a trait worth breeding for. A queen that maintains strong laying patterns for three or four years is genetically valuable.
Identifying supersedure. When a colony replaces its queen through supersedure, the old marked queen disappears and a new, unmarked virgin takes her place. By checking the marking during every inspection, you can immediately detect when supersedure has occurred. This tells you the colony found something wanting in the old queen, which is important information for your breeding records.
Controlling mating in your apiary. If you are breeding queens, clipping the wings of your breeder queens prevents them from leaving with a swarm and potentially mixing up your breeding lines. Combined with marking, clipping gives you full traceability of every queen in your breeding program.
Selecting against swarming. Some beekeepers argue that clipping is a form of swarm management rather than prevention. However, by tracking which colonies attempt to swarm (indicated by the clipped queen being found outside the hive or on the ground nearby), you can identify and select against swarming-prone genetic lines over multiple seasons.
Frequently Asked Questions
Why are queen bees clipped?
Queen bees are clipped to prevent them from flying long distances when they leave with a swarm. When a colony swarms, the queen leaves with roughly half the bees. A clipped queen cannot sustain flight, so she typically lands on the ground or a low branch near the hive. This makes it much easier for the beekeeper to catch the swarm and return it to the hive, preventing the loss of bees. Clipping does not harm the queen or affect her ability to lay eggs.
How do beekeepers mark queen bees?
Beekeepers mark queen bees by placing a small dot of non-toxic paint on the center of the queen’s thorax, the section between her head and abdomen. They typically use a Posca paint pen or similar water-based acrylic marker. The queen is gently immobilized using a marking cage, plunger cage, or held carefully by hand. A 2-3 mm dot of paint is applied, allowed to dry for 30-60 seconds, and then the queen is released back onto the brood comb.
Should you clip queen bee wings?
Yes, clipping one forewing is recommended for most beekeepers, especially those in areas prone to swarming. Clipping does not harm the queen or reduce her egg-laying ability. It serves as a swarm management tool by keeping the queen from flying far if she leaves with a swarm, so the swarm can be easily retrieved. However, some beekeepers choose not to clip for ethical reasons. The decision depends on your management style and swarm pressure in your area.
What is the 3 3 3 rule for bees?
The 3 3 3 rule for bees refers to the first three days of a new queen’s life: for the first three days after emergence, a virgin queen stays inside the hive maturing. Around days 5 to 7, she takes her first orientation and mating flights. Within about 10 to 14 days after emerging, she should be mated and begin laying eggs. This timeline helps beekeepers know when to check for a successfully mated, laying queen after installing a new one.
What color should I use to mark my queen?
The international queen marking color code rotates through five colors on a five-year cycle. Years ending in 0 or 5 use blue, 1 or 6 use white, 2 or 7 use yellow, 3 or 8 use red, and 4 or 9 use green. For 2026, the correct color is the one matching the last digit of the year. Following this system lets any beekeeper instantly determine a queen’s age from her marking color.
Wrapping Up: Marking and Clipping Queens How and Why
Marking and clipping queens may seem intimidating when you first read about the techniques, but both are straightforward skills that any beekeeper can master with a little practice. The benefits are substantial: faster inspections, better swarm control, accurate queen age tracking, and the ability to run a selective breeding program with confidence.
I recommend starting with marking only. Get comfortable applying a clean paint dot to a drone, then to your queen. Once marking feels routine, add clipping to your skill set. Take it one step at a time, and do not feel pressured to do everything perfectly on your first attempt.
Remember the key principles: use non-toxic Posca paint, apply a small dot to the thorax only, hold the queen gently, clip just one forewing, and choose a warm calm day for the task. Follow the international color code system so you can track queen age at a glance, and practice on drones until your hands are steady.
Understanding marking and clipping queens, how and why to do it, will make you a better, more confident beekeeper. These skills are part of the seasonal rhythm of responsible colony management, and once you have done them a few times, they become second nature. Mark your next queen this season and see how much easier your inspections become.