
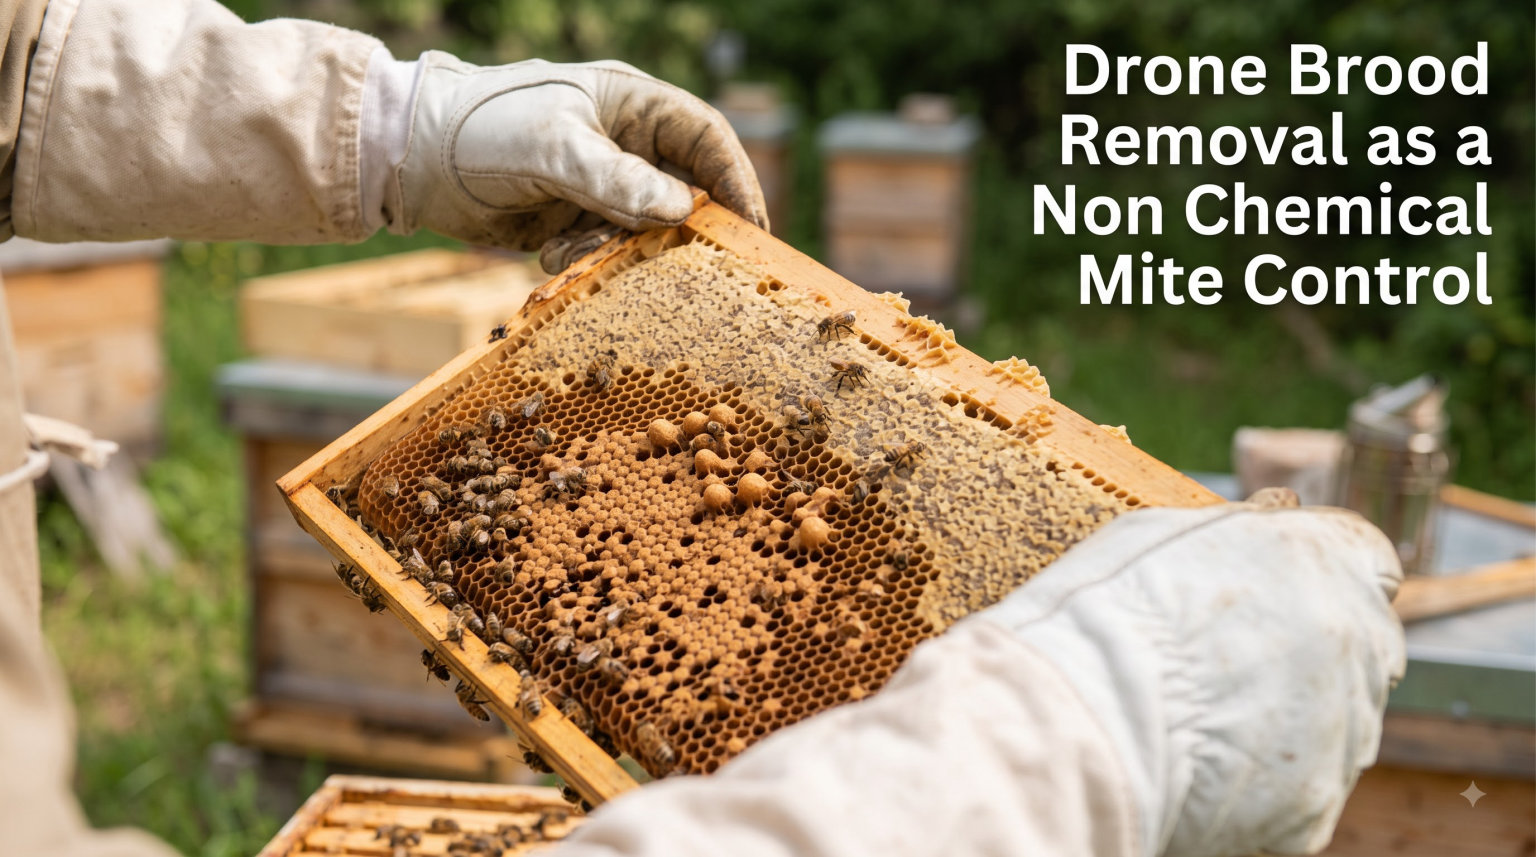
Drone brood removal is a non-chemical varroa mite control method that uses drone comb to trap and remove mites from a honey bee colony. Our team has spent years working with beekeepers who want to reduce or eliminate chemical treatments, and this technique consistently ranks among the most accessible biotechnical options available.
If you are looking for a way to manage Varroa destructor without reaching for synthetic miticides every season, you are in the right place. Drone brood removal mite control takes advantage of the natural behavior of varroa mites, which preferentially infest drone brood, to pull mites out of your hive in a targeted way.
In this guide, we walk you through exactly how the method works, the science behind why mites prefer drone cells, a step-by-step implementation process, timing schedules, equipment checklists, research evidence, and how to combine this approach with other treatments. We also cover the mistakes beginners make most often, drawn from real beekeeper discussions across forums and our own field experience.
Whether you practice treatment-free beekeeping, run an organic operation, or simply want to cut down on chemical inputs as part of an integrated pest management strategy, drone brood removal deserves a place in your toolkit. Let us get into the details.
Table of Contents
What Is Drone Brood Removal?
Drone brood removal is a biotechnical control method for varroa mites that works by offering the colony a frame of drone-sized comb cells, letting the queen lay unfertilized drone eggs in it, and then removing the frame once the brood is capped and infested with mites. By extracting that frame before the new generation of mites can emerge, you physically pull hundreds to thousands of mites out of circulation.
Think of it as a trap. You are giving varroa mites exactly what they want most, a large, nutrient-rich drone larva developing inside a cell with a long capped period, and then you take the whole trap out of the hive before the mites can reproduce and re-enter the bee population. No chemicals, no residues, no concern about resistance.
This method falls under the umbrella of integrated pest management, or IPM. In an IPM framework, you combine multiple low-impact strategies rather than relying on a single chemical silver bullet. Drone brood removal sits alongside other biotechnical tactics like screen bottom boards, brood breaks, and trapping comb strategies. Each one chips away at the mite population from a different angle.
One thing to understand up front is that this is not a one-and-done treatment. Drone brood removal works as a recurring practice. You insert a drone frame, wait for the bees to draw it out and the queen to lay in it, remove it at the right moment, and repeat the cycle throughout the active beekeeping season. Consistency is what makes it effective.
Beekeepers who use this method report seeing anywhere from several hundred to over two thousand mites in a single removed frame, depending on the colony’s mite load and how well the frame was timed. Forum discussions on r/Beekeeping and BeeSource are full of photos showing the mite counts beekeepers find when they uncap and inspect frozen drone comb. The visual proof is compelling.
The method also has a long history. Government agricultural agencies, university extension programs, and beekeeping associations have published guidance on drone brood removal for decades. It is a well-established, scientifically backed technique, not a folk remedy or an untested hack.
Why Varroa Mites Prefer Drone Brood (The Science)
To understand why drone brood removal works so well, you need to understand why varroa mites are drawn to drone brood in the first place. The answer comes down to biology, specifically the post-capping period and mite reproductive success.
The Post-Capping Period Difference
When a honey bee larva reaches the point where its cell is capped with wax, it begins its transformation from larva to adult. This capped phase is called the post-capping period, and it is the window during which varroa mites reproduce inside the sealed cell.
Worker brood has a post-capping period of about 12 days. Drone brood, by contrast, remains capped for approximately 14 to 15 days. Those extra two to three days matter enormously for a reproducing mite. The longer capped period gives the foundress mite more time to produce additional offspring that reach maturity before the cell is opened.
This difference is the biological foundation of the entire drone brood removal strategy. Mites that enter drone cells can produce significantly more viable offspring than mites that enter worker cells. The drone cell is, from a mite’s perspective, prime real estate.
Mite Fecundity on Drone vs Worker Brood
Mite fecundity refers to how many offspring a single female mite can produce. Research has shown that a varroa foundress entering a worker cell typically produces one to two mature daughters by the time the bee emerges. On drone brood, that same mite can produce two to three mature daughters, and sometimes more.
This means a mite reproducing on drone brood has roughly double the reproductive success compared to one on worker brood. The mites know this, or more accurately, natural selection has favored mites that preferentially seek out drone cells. When given a choice, varroa mites enter drone cells at a rate several times higher than their proportion in the comb would predict.
Some studies have found that mites preferentially infest drone brood at rates 8 to 12 times higher than worker brood. If drone cells make up only 10 percent of the brood nest, they may harbor 40 to 60 percent of the reproducing mite population. This concentration effect is exactly what makes drone brood removal so efficient.
Phoretic Mites and Reproducing Mites
At any given time, a portion of the varroa population in a hive is phoretic, meaning the mites are riding on adult bees and not actively reproducing. The other portion is hidden inside capped brood cells, actively reproducing. Chemical treatments like oxalic acid only kill phoretic mites, because the chemical cannot penetrate capped cells.
This is a critical distinction. When you use oxalic acid during a period when brood is present, you only kill the mites that are exposed on adult bees. The mites safely sealed inside capped cells survive and repopulate. Drone brood removal targets the reproducing mites, the ones inside capped cells, which chemical treatments often miss.
By combining drone brood removal, which targets reproducing mites, with an oxalic acid treatment, which targets phoretic mites, you can hit the mite population from both sides. We cover this combination in detail later in this guide.
The Caps Around Drone Cells Are Larger
Drone cells are wider and taller than worker cells. The larger diameter makes them easier for mites to enter before capping, and the extra depth provides more room for multiple mites to hide and reproduce. A single drone cell can harbor multiple foundress mites, each producing their own offspring.
This is why a fully drawn, fully capped drone frame can contain a remarkable concentration of mites. You are essentially creating a mite magnet and then removing it from the colony.
How to Use Drone Brood Removal for Mite Control: Step by Step
The process of drone brood removal mite control is straightforward once you understand the sequence. Here is the complete step-by-step guide that our team follows and recommends.
Step 1: Insert a drone frame into the brood nest. Place your drone comb frame in the center of the brood nest where the queen is actively laying. In a typical Langstroth hive, this means the second or third frame from the edge of the cluster. Positioning matters because the queen needs to find the frame and start laying in it promptly.
Step 2: Let the bees draw out the comb. If you are using foundationless drone comb or plastic drone foundation, the bees need time to draw the wax cells to full depth. During a nectar flow or when you are feeding syrup, this happens quickly, often within a week. If there is no flow and no feeding, drawing comb will be slow or may not happen at all.
Step 3: Wait for the queen to lay drone eggs. Once the comb is drawn, the queen will typically lay unfertilized eggs in the larger drone cells quickly. You can check the frame after a few days to confirm eggs are present. The queen is attracted to the larger cell size and will fill these cells preferentially when they are available.
Step 4: Allow the brood to develop and get capped. Drone larvae develop over about 24 days from egg to emergence. The window for removal is after the cells are capped but before the new drone, and the new generation of mites, emerge. Capping typically occurs around day 9 to 10 from when the egg was laid. You want to remove the frame 18 to 22 days after the queen laid the eggs, which means roughly 8 to 12 days after capping.
Step 5: Remove the frame before emergence. Pull the frame out of the hive once the cells are fully capped and have been capped for about a week. If you wait too long and the drones start emerging, the mites will also emerge and re-enter the bee population. Timing is everything.
Step 6: Freeze the frame for at least 24 to 48 hours. Place the entire frame in a freezer. This kills the drone pupae and all the mites inside the capped cells. Freezing is the most reliable method because it kills every life stage of the mite, including eggs and immature stages that chemical treatments cannot reach.
Step 7: Uncap and verify, or return the frame. After freezing, some beekeepers uncap a section of cells to count mites and confirm the method is working. This is a great monitoring practice. You can then scratch open the cappings and return the frame to the hive for the bees to clean out, or discard the brood if you prefer.
Step 8: Return the cleaned frame and repeat. Once the bees have cleaned out the dead brood, the frame is ready for another cycle. Reinsert it into the brood nest and start the process over. Each cycle takes roughly 24 to 28 days from insertion to removal.
Step 9: Monitor mite levels regularly. Use sugar shakes, alcohol washes, or sticky board drops to track your mite population throughout the season. This tells you whether drone brood removal alone is keeping mites in check or whether you need to add another treatment method.
Timing and Frequency: The 28-Day Cycle
The most common question we hear from beekeepers is simple: how often should you remove drone brood for varroa control? The answer is every 24 to 28 days during the active brood-rearing season.
This 28-day cycle aligns with the drone development timeline. From the moment the queen lays an egg in a drone cell to the point where the drone is about to emerge is approximately 24 days. You want to remove the frame after the cells are capped but before emergence, which puts your removal window around day 20 to 22 from egg laying.
If you are running multiple drone frames, you can stagger them. Insert one frame, then insert another two weeks later. This way, you have a frame ready for removal every two weeks instead of every four. Staggering increases the total mite removal per season.
Seasonal Timing
Start drone brood removal in early spring when the queen begins laying in earnest and drone production ramps up naturally. This is typically when colonies are building population and the queen is laying drone eggs of her own accord. Your drone frame simply captures and concentrates this natural drone production.
Continue the cycle through late spring and summer. These are the peak mite reproduction months, and this is when drone brood removal does its heaviest lifting. Each cycle you complete during this window pulls a fresh batch of reproducing mites out of the colony.
Taper off in late summer and early fall. As the colony reduces brood rearing in preparation for winter, drone production naturally declines. At this point, shift your focus to a fall treatment that targets phoretic mites, such as an oxalic acid vaporization during a brood break or after caging the queen.
Regional and Climate Considerations
Your local climate directly affects when you should start and stop. In warmer southern regions where colonies maintain brood year-round, you may need to start drone brood removal earlier in spring and continue later into fall. The extended brood-rearing season means mites have more time to reproduce, so more removal cycles are beneficial.
In colder northern climates, the brood-rearing window is shorter. You might only fit three to four full cycles between late spring and early fall. Make each cycle count by using well-drawn drone frames and timing removals precisely.
In areas with strong early nectar flows, bees draw comb quickly and the queen lays eagerly. This is ideal for drone brood removal. In drought years or areas with dearth, the bees may not draw comb or the queen may not lay drone eggs, and the method loses effectiveness. Always have a backup mite monitoring plan.
Equipment Needed for Drone Brood Removal
One of the appeals of drone brood removal is that the equipment list is short. Here is what you need.
Drone frames or drone foundation. You can use purpose-built drone frames with oversized cell imprints, green plastic drone foundation (the green color helps you identify the frame quickly during inspections), or simply frames fitted with drone-sized wax or plastic foundation. Some beekeepers use foundationless frames placed in the brood nest, as bees tend to draw drone-sized cells naturally in certain positions. One drone frame per colony is the standard recommendation for mite trapping purposes.
A freezer. You need freezer space large enough to hold a full deep or medium frame. This is non-negotiable. Freezing is the kill method. A chest freezer or upright freezer with enough clearance for a frame laying flat works well. If your kitchen freezer is too small, a small dedicated chest freezer is a worthwhile investment.
Hive tool and bee brush. Standard beekeeping tools for removing the frame from the hive and brushing off the bees before taking the frame to the freezer.
Optional: an uncapping fork or capping scratcher. This lets you open capped cells to inspect and count mites after freezing. It is a monitoring tool, not strictly necessary, but we highly recommend it. Seeing the mites with your own eyes builds confidence in the method and helps you track trends.
Optional: a second drone frame per colony. If you want to stagger cycles and increase removal frequency, having two drone frames per hive lets you rotate them on a two-week schedule instead of four.
How many drone combs do you need per colony for mite control? One frame per colony is the standard for trapping purposes. Two frames allow for staggered cycles and more aggressive mite reduction. Going beyond two frames per colony risks allocating too much of the brood nest to drone production, which can weaken the colony’s worker force.
Research Evidence: Does Drone Brood Removal Actually Work?
The short answer is yes, drone brood removal is an effective mite management technique, and the research backs this up. Let us look at what the studies show.
Research conducted at the Dyce Laboratory for Honey Bee Studies at Cornell University provided some of the most cited evidence for this method. In controlled trials, researchers found that periodic removal of capped drone brood significantly reduced varroa mite populations compared to colonies where no drone brood was removed. The key finding was that colonies receiving regular drone brood removal maintained lower mite loads throughout the season and experienced less overwintering loss.
The SARE (Sustainable Agriculture Research and Education) publication on integrated pest management for Varroa destructor in the northeastern United States specifically evaluated drone brood removal as a non-chemical control method. Their findings indicated that removing drone brood every 24 to 28 days during the active season can reduce the mite population by approximately 40 to 60 percent compared to untreated colonies. This is not a complete elimination, but it is a meaningful reduction achieved without any chemical input.
The National Bee Unit in the UK publishes official guidance endorsing drone brood removal as a cultural treatment for varroa control. Their fact sheets emphasize that the method works because mites preferentially parasitize drone brood cells due to the longer post-capping period, which allows the female mite to generate more mature progeny. Their guidance is used by beekeepers across the UK as part of standard varroa management protocols.
Research has also quantified the mite-trapping efficiency. Studies estimate that a single fully capped drone frame can harbor several hundred to over a thousand mites, depending on the colony’s overall mite load. When you consider that a healthy colony can tolerate a natural mite drop of only a few mites per day on a sticky board, removing a frame with hundreds of mites represents a significant intervention.
However, research also consistently shows that drone brood removal alone is rarely sufficient to keep mites below damaging levels in heavily infested areas or during peak mite reproduction season. Most studies recommend combining it with other methods for best results. This is where integrated pest management comes in. Drone brood removal reduces the reproducing mite population, while other tactics like oxalic acid or formic acid address the remaining phoretic mites.
A common finding across multiple studies is that the effectiveness of drone brood removal depends heavily on consistency. Beekeepers who remove drone frames every 28 days without fail see steady mite reduction. Those who do it sporadically or miss cycles see little benefit, because the mite population rebounds quickly between removals.
Combining Drone Brood Removal With Other Treatments
This is an area where most competing guides fall short, so we want to cover it thoroughly. Drone brood removal is powerful, but it becomes even more effective when combined strategically with other treatments in an integrated pest management program.
Drone Brood Removal Plus Oxalic Acid
This is one of the most effective combinations available to treatment-conscious beekeepers. Here is why it works so well. Drone brood removal pulls reproducing mites out of capped cells. Oxalic acid kills phoretic mites on adult bees but cannot penetrate capped brood. Together, they address both segments of the mite population.
A practical protocol looks like this. During the active season, run your drone brood removal cycles every 28 days to continuously suppress the reproducing mite population. Then, in late fall when the colony has gone broodless or nearly broodless, apply an oxalic acid treatment via vaporization or dribble. With minimal or no capped brood present, nearly all mites are phoretic, and oxalic acid can achieve a very high kill rate.
This combination allows you to enter winter with a dramatically reduced mite load without relying heavily on synthetic chemicals during the honey-producing season. Many treatment-free and organic beekeepers use exactly this protocol.
Drone Brood Removal Plus Screen Bottom Boards
Screen bottom boards allow mites that fall off bees to drop through the screen and exit the hive rather than climbing back up. While the mite reduction from screen bottom boards alone is modest, combining them with drone brood removal adds another layer of mite loss. When you open the hive to remove drone frames, disturbed mites that fall from adult bees pass through the screen and are lost. Every bit counts in an IPM program.
Drone Brood Removal Plus Brood Break
If you requeen a colony or use a brood break as part of swarm control or queen rearing, the period without capped brood creates a window where all mites are phoretic. This is an ideal time to apply oxalic acid. If you have been running drone brood removal before the brood break, you have already reduced the reproducing mite pool, so the brood break plus oxalic acid has fewer mites to clean up and can be even more effective.
The key insight is that no single method provides complete control. Varroa mites are too prolific and too well-adapted for any one technique to be a standalone solution. But layering complementary methods, each targeting a different segment of the mite population, builds a strong defense that can keep colonies healthy with minimal chemical input.
Cost Comparison: Drone Brood Removal vs Chemical Treatments
No competing guide we found covers the financial side of drone brood removal, so let us break it down. When you compare the cost of drone brood removal to chemical treatments, the economics are favorable for the biotechnical approach, though there are tradeoffs.
Upfront costs. A drone frame or two costs a fraction of what you would spend on chemical treatments over a season. Green plastic drone foundation frames are inexpensive and reusable for many years. If you need to buy a small chest freezer, that is a one-time purchase that also serves other beekeeping purposes like storing comb or pollen patties.
Ongoing costs. Drone brood removal has essentially zero recurring material cost. You reuse the same frames year after year. Chemical treatments, by contrast, must be repurchased every season. Synthetic strips, formic acid pads, oxalic acid, and thymol-based treatments all represent recurring expenses that add up over the years.
Labor costs. This is where the tradeoff lies. Drone brood removal requires more hands-on time per colony. You need to visit each hive to insert frames, check them, remove them at the right time, freeze them, and return them. Chemical treatments often involve a single application and then waiting. If you have many colonies, the labor difference becomes significant.
Forum beekeepers frequently note that the labor investment is worth it for small-scale and hobby beekeepers who value chemical-free practices. For commercial operations with hundreds of colonies, the labor cost of drone brood removal may be prohibitive at full scale, which is why many commercial beekeepers use it selectively on their most valuable breeder colonies rather than across every hive.
Hidden costs of chemical reliance. Chemical treatments carry hidden costs that are harder to quantify. Repeated use of the same chemical class can select for resistant mites, rendering that treatment ineffective and forcing you to switch to more expensive alternatives. Some chemicals leave residues in wax that accumulate over time and may affect colony health and queen viability. Drone brood removal avoids both of these issues entirely.
Limitations and Common Mistakes to Avoid
Drone brood removal is not a perfect solution, and understanding its limitations helps you use it effectively. Here are the most important caveats and the mistakes we see beginners make most often.
Mistake 1: Removing the frame too late. This is the most common and costly error. If you wait until drones are emerging, the mites have already left the cells and re-entered the bee population. You have essentially raised a batch of mites and released them. Mark your calendar when you insert the frame and set a removal date 20 to 22 days later. Do not rely on memory.
Mistake 2: Forgetting about the frame entirely. If you insert a drone frame and then forget about it for weeks, the drones emerge, the mites emerge, and the frame becomes part of the permanent brood nest. Now it is producing mites instead of trapping them. This is worse than not using the method at all. Set phone reminders or use a beekeeping app to track your removal dates.
Mistake 3: Using too many drone frames. If you dedicate too much of the brood nest to drone production, you reduce the colony’s worker bee output. Workers do the foraging, nursing, and hive maintenance. One drone frame per colony, or two at most for staggered cycles, is the right balance. More than that risks weakening the colony.
Mistake 4: Expecting drone brood removal alone to control mites. In heavily infested colonies or during peak mite season, drone brood removal alone will not bring mite levels below the damage threshold. The research is clear on this. Use it as one component of an integrated program, not as a standalone treatment, unless your mite pressure is consistently very low.
Mistake 5: Not monitoring mite levels. If you are not doing regular mite counts, you have no way of knowing whether drone brood removal is working. Sugar shakes or alcohol washes every few weeks give you the data you need to make informed decisions. Blindly trusting any single method is risky beekeeping.
Mistake 6: Putting the frame in the wrong position. If the drone frame is placed outside the brood nest, the queen may not find it or may not lay in it. The frame needs to be in the heart of the brood nest where the queen is actively working. Check after a few days and reposition if the frame is empty.
Limitation: Labor intensive. For beekeepers with limited time or many colonies, the hands-on nature of drone brood removal can be a barrier. Each cycle requires a hive visit for insertion, a check, and a removal. If you have five hives, this is manageable. If you have fifty, it becomes a significant time commitment.
Limitation: Depends on colony cooperation. The bees need to draw the comb and the queen needs to lay in it. During a dearth, when the colony is stressed, or when the queen has stopped laying drone eggs naturally, the method stalls. You cannot force the bees to cooperate, so results vary with conditions.
Limitation: Seasonal restriction. Drone brood removal only works when the colony is rearing brood. In winter or during extended broodless periods, there is no drone brood to remove. This means the method provides no protection during the most critical overwintering period, which is why a fall treatment targeting phoretic mites is so important.
FAQs
How does drone brood removal help control varroa mites?
Drone brood removal helps control varroa mites by exploiting the fact that mites preferentially infest drone brood. When you insert a drone frame, allow it to be capped, and remove it before emergence, you physically extract a large number of reproducing mites from the colony. Because mites prefer drone cells at rates up to 12 times higher than worker cells, a single drone frame can trap hundreds of mites in one removal cycle.
How often should you remove drone brood for varroa control?
You should remove drone brood every 24 to 28 days during the active brood-rearing season. This cycle aligns with the drone development timeline, ensuring you remove the frame after cells are capped but before drones and mites emerge. Starting in early spring and continuing through late summer typically gives you three to five removal cycles per season depending on your climate.
What is the best frame for drone brood removal?
The best frame for drone brood removal is a purpose-built drone frame with oversized cell imprint, or a standard frame fitted with green plastic drone foundation. The green color helps you quickly identify the frame during inspections. One drone frame per colony is the standard recommendation for effective mite trapping.
Can drone brood removal alone keep varroa mites under control?
Drone brood removal alone is rarely sufficient to keep varroa mites below damaging levels in most situations. Research shows it can reduce mite populations by 40 to 60 percent, which is significant but not complete. For best results, combine drone brood removal with other methods like oxalic acid treatment during broodless periods as part of an integrated pest management program.
How many drone combs do you need per colony for mite control?
One drone frame per colony is the standard recommendation for mite control. Two frames allow you to stagger cycles on a two-week schedule for more aggressive mite reduction. Using more than two frames risks dedicating too much brood nest space to drone production, which can reduce the colony worker bee population.
Wrapping Up
Drone brood removal as a non-chemical mite control method is one of the most accessible and scientifically validated biotechnical tools available to beekeepers in 2026. It uses the natural preference of varroa mites for drone brood to physically remove reproducing mites from your colonies without any chemical input.
The key takeaways are straightforward. Use one or two drone frames per colony. Follow a 28-day removal cycle throughout the active season. Freeze the frames to kill all mite life stages. Monitor your mite levels regularly to confirm the method is working. And most importantly, combine drone brood removal with other IPM tactics rather than relying on it as a standalone solution.
We have seen beekeepers across forums and in our own network achieve excellent results with this method when applied consistently. The beekeepers who report the most success are those who treat drone brood removal not as a quick fix but as a seasonal habit, integrated into their regular inspection routine alongside monitoring and complementary treatments.
If you are moving toward treatment-free or low-chemical beekeeping, drone brood removal mite control is one of the best places to start. It is affordable, effective, and grounded in decades of research. Start with one frame this season, track your results, and build from there. Your bees will benefit from the reduced chemical load, and you will gain a deeper understanding of how varroa mites interact with your colonies.