
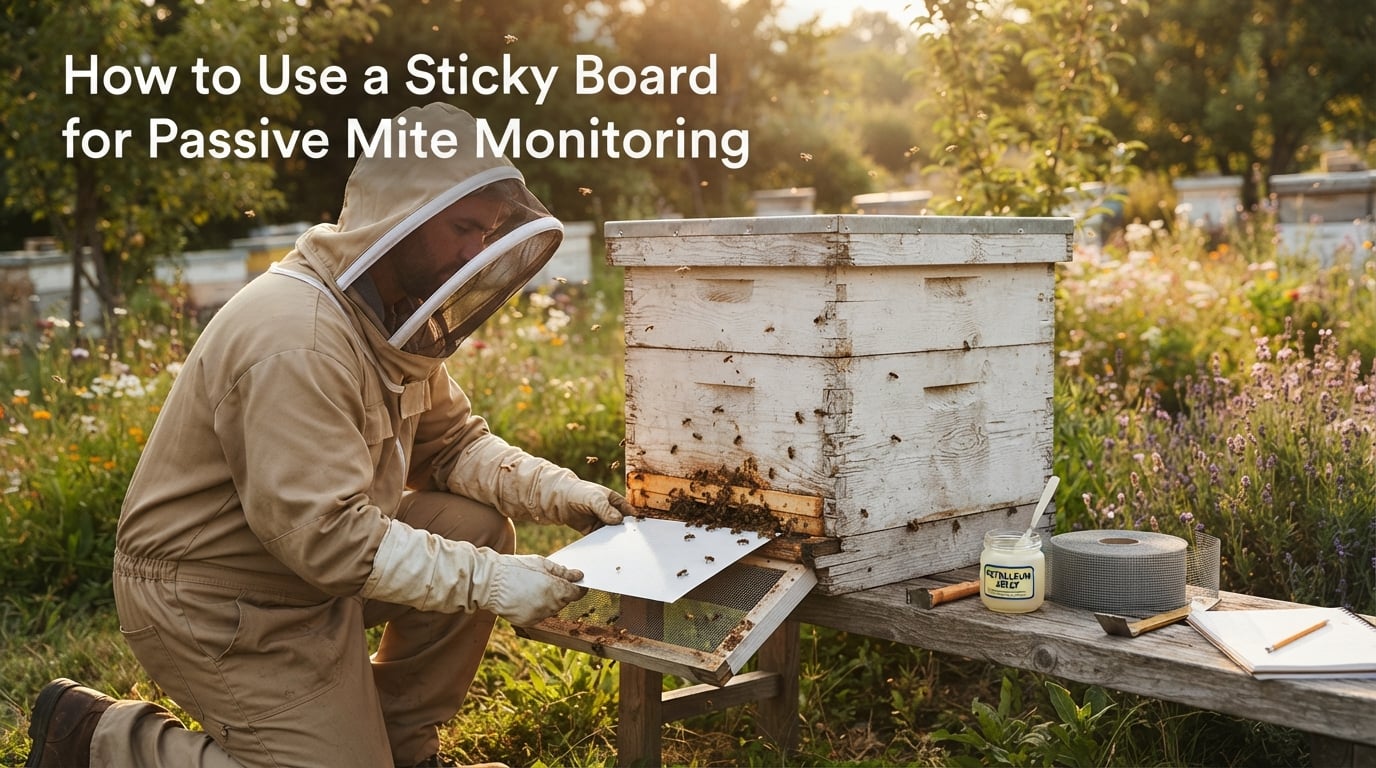
A sticky board is the simplest non-invasive tool for passive mite monitoring in a honey bee colony, and it costs almost nothing to set up. You slide a sticky-coated board under a screened bottom, leave it for 24 to 48 hours, then count the fallen Varroa mites to gauge infestation.
In this guide, I’ll walk you through the exact setup I use in my own apiary, how to count mites accurately, and how to read the results so you know when treatment is actually needed. I’ve also included a comparison with the alcohol wash and sugar shake tests, plus answers to the most common questions I see on beekeeping forums.
Table of Contents
What Is a Sticky Board and Why Beekeepers Use It
A sticky board is a flat surface coated with a sticky substance (usually petroleum jelly or cooking oil) placed beneath a hive’s screened bottom board. As phoretic mites (adult Varroa attached to bees) naturally fall off their hosts, they land on the board and become trapped.
This passive monitoring method works because Varroa destructor mites constantly move between bees and brood cells. A small percentage drops every day as part of their natural life cycle. Counting that drop over a fixed window gives you a reliable proxy for the total mite population in the colony.
The big advantage is that no bees are harmed. Unlike an alcohol wash or sugar shake, which requires killing or stressing roughly 300 bees, sticky boards let you sample a full-strength colony without disturbing it. That matters during honey flow or in weak colonies that can’t afford to lose foragers.
For new beekeepers, sticky boards also serve as an early warning system. Mite damage often shows up before you see visible symptoms like deformed wings, and a single sticky board reading can reveal a problem months before the colony collapses.
Materials Needed to Set Up a Sticky Board
You can buy a commercial sticky board or build your own in under 30 minutes. Here is everything you need:
Backing sheet: A rigid or semi-rigid sheet cut to match your hive’s interior dimensions. Corrugated plastic sign material, a piece of white laminate countertop offcut, or even a trimmed baking sheet all work well.
Sticky coating: Petroleum jelly (Vaseline), vegetable shortening, or cooking oil. I prefer plain vegetable oil because it spreads evenly and doesn’t dry out.
Hardware cloth or screen: Eight mesh per inch works for most climates. The screen prevents bees from walking onto the sticky surface and getting stuck.
Marker: A fine-tip permanent marker or washable paint pen for drawing a 1-inch grid on the board to simplify counting.
Latex or nitrile gloves: Makes the petroleum jelly application much less messy.
Optional: A small plastic tote or covered box for transporting the board back to your kitchen without smearing the mites.
Total cost for a DIY board is usually under $5, and the same board can be cleaned and reused for several seasons.
Step-by-Step Setup Instructions
Setting up a sticky board correctly takes about 5 minutes once you’ve done it a few times. Follow these steps in order:
Prepare the board surface. If you want easier counting, draw a 1-inch grid across the entire surface with your permanent marker. Use a ruler and keep the lines light so they don’t confuse your eye when counting.
Apply the sticky coating. Spread a thin, even layer of petroleum jelly or oil across the entire board. Two tablespoons of oil works for a standard Langstroth bottom board. Too little and mites bounce off; too much and they get buried in the film.
Install the screen. If your hive doesn’t already have a screened bottom, staple a piece of 8-mesh hardware cloth over the board’s opening so the bees cannot reach the sticky surface. The screen should be taut with no sagging.
Insert the board. Slide the coated board into the slot at the back of your screened bottom board. Most hives have a 3/8-inch runner designed for exactly this. Push it all the way in until it sits flat under the cluster.
Label by hive. Use a small piece of masking tape on the back edge with the hive number and the date you installed the board. This is critical if you monitor multiple colonies on the same schedule.
Close the hive. No need to seal it further. The entrance stays open, and the bees continue normal activity.
If you’re using a solid bottom board (not screened), the process changes. You’ll need to remove the board from a rear access panel rather than sliding it underneath, and you should reduce the monitoring window to 24 hours because bees tend to drag debris over sticky areas and clean them up.
How Long to Leave the Sticky Board in the Hive
The standard monitoring window is 24 to 72 hours depending on your bottom board type. Leaving the board longer captures more mites and gives a more accurate estimate, but it also increases the chance of debris, dead bees, or moisture ruining the sample.
For a screened bottom board, 48 hours is the sweet spot. It’s long enough to smooth out day-to-day variation in natural mite drop, but short enough that debris stays minimal. Many beekeepers install the board at the start of a weekend and pull it at the end.
For a solid bottom board, stick to 24 hours. Without screen protection, the bees quickly figure out the sticky surface and either avoid it or try to clean it. A 24-hour pull captures the bulk of fresh mites before they get disturbed.
Extended 3-day sampling is fine for research or stratified sampling techniques, but for routine monitoring I find 48 hours gives numbers that closely match an alcohol wash done on the same day. Forum beekeepers on Beesource and Reddit report similar results in their own comparisons.
How to Count Mites on a Sticky Board
Counting mites is straightforward once you know what to look for. Varroa mites are reddish-brown, oval-shaped, and about 1.5 mm across. On a white background, they stand out clearly.
Remove the board carefully so you don’t smear the mites. Carry it to a well-lit area and use a magnifying glass or reading glasses if you have them. Count mites one grid square at a time and tally the total.
To calculate the daily drop rate, divide the total count by the number of hours the board was in the hive, then multiply by 24. For example, 30 mites in 48 hours equals (30 divided by 48) multiplied by 24, which is 15 mites per day.
Some beekeepers with many colonies use a stratified sampling shortcut: count every other row of squares and multiply by two. This cuts counting time in half with a small accuracy trade-off that’s acceptable for routine checks.
Interpreting Results and Treatment Thresholds
Interpreting your sticky board numbers depends on the season and your local mite pressure. The widely accepted threshold in North America is 3% infestation in late summer, which translates to about 9 to 10 mites per day for a strong colony.
Here’s a general guideline I share with new beekeepers:
Under 3 mites per day (24-hour drop): Low mite load. Continue routine monthly monitoring.
3 to 9 mites per day: Moderate load. Re-check in two weeks and consider treatment timing.
Over 9 mites per day: High load. Treat the colony as soon as possible.
Over 30 mites per day: Severe infestation. Immediate aggressive treatment is needed to save the colony.
The “3 3 3 rule” you may have heard about refers to treating when you see 3 mites per 100 bees in an alcohol wash, which corresponds to roughly 9 mites per day on a sticky board for an average colony. Either method points to the same decision point.
Spring thresholds are typically lower because bees are building up for the honey flow. A late-fall reading tells you whether your winter bees will start the cold season healthy or already heavily infected with mite-vectored viruses.
Sticky Board vs Alcohol Wash vs Sugar Shake
Each Varroa monitoring method has trade-offs. Here’s how they compare for typical hobbyist beekeepers:
Sticky board: Non-invasive, cheap, captures natural mite drop. Accuracy depends on duration and debris. Best for trend tracking over a season rather than one-shot decisions.
Alcohol wash: Highly accurate as a snapshot. Kills roughly 300 bees but gives a percentage infestation directly. Best when you need a confident yes/no answer before treatment.
Sugar shake (or sugar roll): Less accurate than alcohol but doesn’t kill bees. Uses powdered sugar to dislodge mites from a sample. Best for beekeepers uncomfortable with the alcohol method.
Many experienced beekeepers combine methods. A monthly sticky board tracks the trend, and an alcohol wash at peak times (late summer, post-treatment check) confirms the absolute number. This two-method approach catches the cases where sticky boards undercount because of debris or bee behavior.
If you’re new to mite monitoring, start with sticky boards. They’re forgiving, inexpensive, and let you build confidence before you start sacrificing bees for science.
Common Mistakes to Avoid With Sticky Boards
These are the issues I see most often in beginner setups. Avoiding them will save you a second trip to the apiary.
Skipping the screen. Without hardware cloth over the sticky surface, bees climb down and get stuck. This stresses the colony and contaminates your count.
Too much or too little coating. A heavy layer of petroleum jelly buries mites and slows counting. A thin dry patch lets mites bounce off. Aim for an even, glossy film.
Mixing up boards from different hives. Label every board with hive number and date. A stack of identical-looking sheets is a recipe for bad data.
Pulling the board at the wrong time. Avoid leaving it during a strong nectar flow when debris and propolis accumulate fast. Mid-week, dry weather is ideal.
Treating based on one low reading. A single low count doesn’t mean your colony is mite-free. Natural drop varies day to day, and only consistent readings build a real picture.
Not cleaning reusable boards. Old debris and wax confuse the count. Wash the board with warm soapy water and dry it fully before re-coating.
When to Monitor: Seasonal Considerations
Mite populations grow fastest in late summer when bee brood is at peak. That makes August and September the most critical monitoring window in most temperate climates.
I monitor monthly from May through October, then stop when the colony enters winter cluster. Winter monitoring isn’t useful because the bees form a tight cluster, mite drop is reduced, and the cluster heat can damage coated boards.
Always monitor before treatment to confirm thresholds, and again two weeks after treatment to verify it worked. Some treatments, particularly oxalic acid vapor, can produce surprisingly high post-treatment drops. That’s a good sign, not a bad one.
Post-treatment sticky board counts that stay high suggest the treatment didn’t reach mites hiding in capped brood. A second round or a different product is usually the next step.
FAQs
How accurate is a sticky board compared to an alcohol wash?
Sticky boards are slightly less precise than an alcohol wash because natural mite drop varies day to day. Over a 48-hour window, sticky board numbers usually fall within 20 percent of an alcohol wash done on the same colony. They are accurate enough for routine decisions but not for fine-grained research.
Can you leave a sticky board in the hive permanently?
Yes, but it is not recommended for accurate counting. Debris, dead bees, and moisture accumulate within a week and make the count unreliable. Most beekeepers leave the board in for 24 to 72 hours per check, then remove it. A permanent board is fine for passive Varroa reduction in a screened bottom but not for measuring mite load.
What mesh size should I use with a sticky board?
Eight mesh per inch (8 holes per inch) hardware cloth is the standard. It is large enough for mites to fall through but small enough to keep bees out of the sticky area. Finer mesh (like window screen) clogs with propolis. Coarser mesh lets bees reach the surface and get stuck.
How do you clean and reuse a sticky board?
Wash the board with warm soapy water and a soft cloth to remove old petroleum jelly, wax, and debris. Rinse thoroughly and let it dry completely before applying a fresh coat of sticky material. A well-maintained board can last 3 to 5 seasons of regular use.
How many mites on a sticky board means I need to treat?
For a strong colony over a 48-hour period, more than 18 total mites (about 9 per day) generally indicates treatment is needed. In spring or for weaker colonies, treat at half that threshold. The standard North American late-summer threshold corresponds to roughly 3 percent infestation in an alcohol wash on the same colony.
Final Thoughts on Passive Mite Monitoring
How to use a sticky board for passive mite monitoring boils down to three habits: install it consistently, count it carefully, and act on the numbers before they pass your threshold. It’s the cheapest insurance your bees can have.
Start with a 48-hour monitoring window in your next inspection, log the results in a notebook or app, and compare them with what your bees look like. Within a season you’ll have a clear baseline and the confidence to make treatment decisions without second-guessing yourself.
For more detail on Varroa treatment options, integrated pest management, and seasonal colony management, keep exploring our beekeeping guides. The mites won’t wait, but with a sticky board in hand, you’ll always know where your colony stands.