
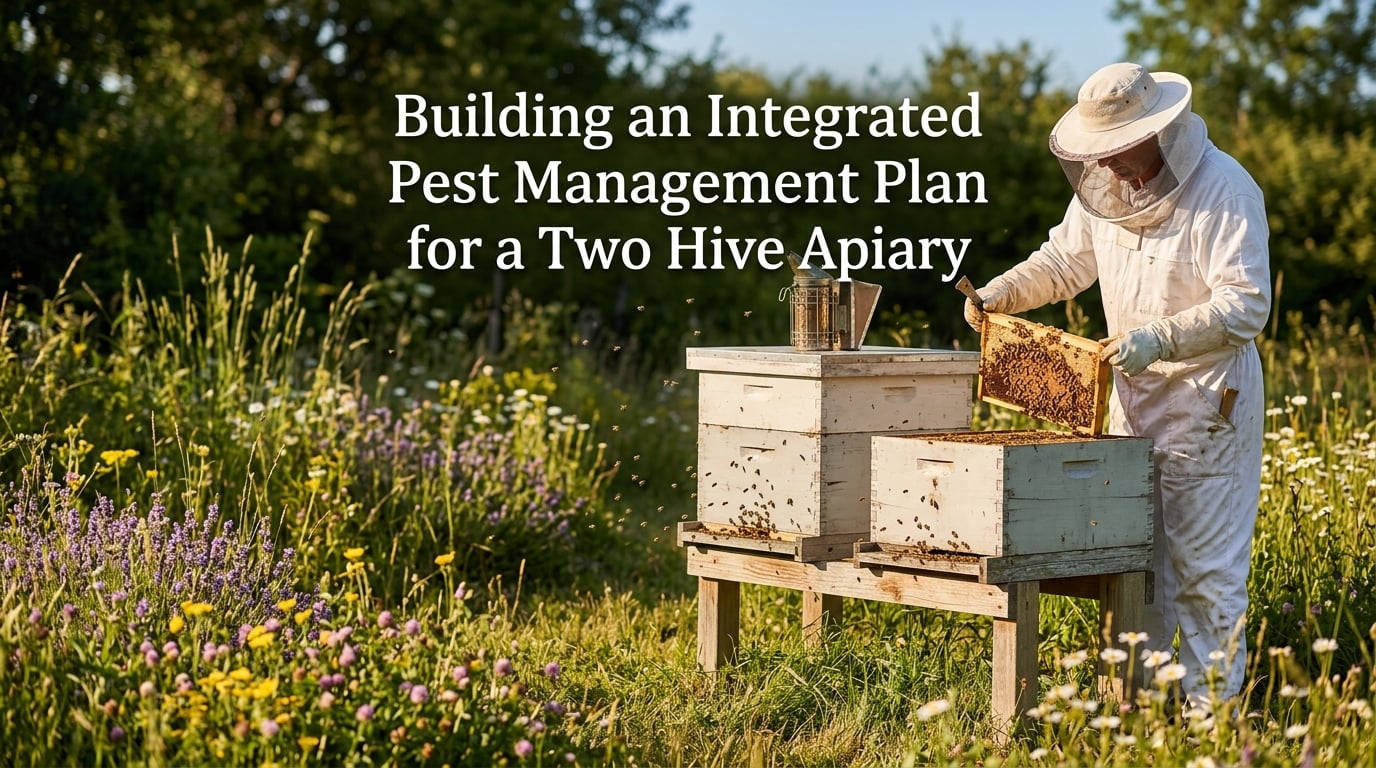
Two hives sitting in your backyard can double your honey harvest, but they also double your responsibility when it comes to pest management. Building an integrated pest management plan for a two hive apiary is the single most effective way to protect your colonies from the threats that destroy more beehives each year than anything else. Varroa mites alone cause more colony losses than winter weather, poor nutrition, and all other factors combined.
If you are running just two hives, you have a real advantage. You can inspect more thoroughly, monitor more frequently, and respond faster than any commercial operation ever could. But that advantage only matters if you have a plan. A reactive approach, waiting until you see problems, is exactly how beekeepers lose colonies between inspections.
In this guide, I will walk you through building a complete integrated pest management plan designed specifically for a two hive operation. You will learn what IPM is, the five core components every plan needs, how to identify the major pests threatening your bees, proven monitoring methods you can do at home, and treatment strategies that range from prevention-first to last-resort chemical controls.
I will also cover the strategies unique to small-scale, two-hive beekeeping that most guides skip entirely. Things like cross-contamination prevention between your hives, seasonal timing for your climate, and how to coordinate with neighboring beekeepers so your treatments actually work. By the end, you will have a practical framework you can put into action this season.
Whether you are starting your first pair of hives this 2026 or you have been keeping bees for years and want to move away from a calendar-based treatment schedule, this plan will give you the structure you need. The goal is simple: healthy, resilient colonies that produce well and survive winter, year after year.
Table of Contents
What Is Integrated Pest Management for Beekeeping?
Integrated Pest Management, or IPM, is a strategic, multi-layered approach to controlling pests that combines prevention, monitoring, and targeted interventions in order from least to most disruptive. Rather than reaching for a chemical treatment on a fixed schedule, an IPM plan uses information about pest populations and colony health to decide when and how to act.
The core philosophy is simple. You create conditions that discourage pest populations from establishing, you monitor regularly so you catch problems early, and you intervene with the gentlest effective method first. Chemical treatments become a tool of precision rather than habit.
This matters enormously in beekeeping because honey bees are extraordinarily sensitive creatures. They are insects, which means most broad-spectrum insecticides that kill pests will also kill them. Every chemical treatment you apply inside a hive carries some risk to the bees, to the brood, and to the honey you eventually harvest. IPM minimizes that risk by reducing how often you need to reach for chemicals at all.
The Three Basic Rules of an IPM Program
Every integrated pest management program, whether for crops, forests, or beehives, rests on three foundational rules that guide every decision you make.
Rule 1: Prevent pest problems before they start. A healthy, strong colony in a well-located apiary with good nutrition and genetics will resist most pests on its own. Prevention includes choosing mite-resistant stock, providing diverse forage, ensuring proper ventilation, and managing hive density.
Rule 2: Monitor regularly and identify problems accurately. You cannot manage what you do not measure. Regular monitoring means you know your mite levels, you can spot early signs of small hive beetle activity, and you catch disease before it spreads. Identification matters because treating for the wrong pest wastes time and stresses the colony.
Rule 3: Use the least disruptive effective control. When intervention is needed, start with the gentlest option that will work. Physical removal before biological controls, biological before chemical. This protects your bees, slows the development of treatment resistance in pest populations, and keeps your honey clean.
These three rules are not abstract theory. They are the decision-making framework behind every recommendation in this guide. When you face a pest problem in your two hive apiary, run it through these three rules and the right action usually becomes clear.
Why IPM Beats Calendar-Based Treatment
Many beekeepers treat on a fixed schedule: oxalic acid in December, formic acid in August, repeat. Calendar-based treatment feels safe because it is predictable, but it creates two serious problems over time.
First, it applies treatments when they may not be needed, exposing bees to unnecessary stress and chemicals. Second, and more dangerously, it can create conditions where pests develop resistance. Varroa mites have already shown reduced susceptibility to several common treatments in regions where the same chemical is used year after year on a fixed rotation.
IPM replaces guesswork with data. You treat when monitoring tells you treatment is needed, you choose the method that fits the season and the pest pressure, and you rotate active ingredients to avoid resistance. The result is fewer total treatments, healthier bees, and better long-term outcomes.
The 5 Core Components of an IPM Plan
The five components of integrated pest management form a hierarchy that moves from proactive prevention to reactive intervention. Each layer builds on the one before it, and you should exhaust lower-level options before escalating. Here are the five components every beekeeper should understand.
1. Prevention and Cultural Practices. This is the foundation. It includes selecting pest-resistant bee genetics like Varroa Sensitive Hygiene (VSH) stock or Russian bees, siting your apiary in full sun to discourage small hive beetles, ensuring strong ventilation to reduce moisture-loving diseases like chalkbrood, maintaining diverse year-round forage, and keeping your colonies strong enough to defend themselves. Cultural practices cost nothing and prevent the majority of pest problems before they begin.
2. Monitoring and Identification. Regular, systematic monitoring tells you what is actually happening in your hives. This means performing mite counts using a sugar roll or alcohol wash, using sticky boards for natural mite drop counts, inspecting brood patterns for disease signs, and tracking what you find. Without monitoring data, every treatment decision is a guess.
3. Physical and Mechanical Controls. These are hands-on interventions that remove or block pests without chemicals. Installing screened bottom boards lets fallen mites drop out of the hive. Using drone brood traps exploits the fact that Varroa preferentially reproduce in drone cells, letting you remove and freeze capped drone brood to cut mite populations. Entrance reducers help strong colonies defend against small hive beetles and robbing bees.
4. Biological Controls. This component leverages living organisms or natural bee behaviors against pests. Selecting and breeding bees with strong hygienic behavior means your colonies will detect and remove diseased brood and mite-infested pupae on their own. Some beekeepers use beneficial soil nematodes that parasitize small hive beetle larvae in the ground around hives. Biological controls work slowly but sustainably.
5. Chemical Controls. The final layer, used only when monitoring shows pest levels above the economic threshold. This includes organic-approved treatments like oxalic acid, formic acid, and thymol-based products, as well as synthetic miticides. Chemical controls should always be applied according to label instructions, rotated between active ingredients to prevent resistance, and timed to avoid contaminating honey intended for harvest.
Think of these five components as a ladder. You start at the bottom with prevention and only climb higher when lower rungs are not enough. Most well-managed two hive apiaries spend almost all their time on the first three rungs and rarely need to reach chemical controls if they monitor diligently.
Pest Identification: Know Your Threats
Accurate pest identification is the difference between effective management and wasted effort. Treating for the wrong problem stresses your bees and solves nothing. Here are the major pests and diseases you need to recognize in a two hive apiary, ranked roughly by the threat they pose.
Varroa Mites (Varroa destructor)
Varroa mites are the number one threat to honey bee colonies worldwide, and they deserve the most attention in any IPM plan. These external parasites feed on adult bees and developing brood, transmitting viruses like Deformed Wing Virus (DWV) that weaken and ultimately kill colonies.
Visible signs of heavy Varroa infestation include bees with deformed, stubby wings crawling on the landing board, spotty or peppered brood patterns, and a general decline in colony population. However, by the time you see these symptoms, mite levels are already dangerously high. This is why monitoring with a sugar roll or alcohol wash matters far more than visual inspection for catching Varroa early.
Varroa reproduce inside capped brood cells, with a strong preference for the larger drone brood where they can produce more offspring per cycle. A single female mite entering a cell can produce three or more daughters, which means populations can multiply rapidly during the brood-rearing season if left unchecked.
Small Hive Beetles (Aethina tumida)
Small hive beetles are dark brown to black insects about one-third the size of a honey bee that enter hives to lay eggs. Their larvae tunnel through comb and honey, causing fermentation and a characteristic slimy mess that can ruin stored honey and drive bees to abandon the hive.
Early signs of a small hive beetle problem include seeing adult beetles scurry into crevices when you open the hive, slime trails on comb, and a fermented, decaying fruit smell. Beetle larvae can be confused with wax moth larvae, but beetle larvae are smaller, more active, and have spines along their bodies.
Forum beekeepers consistently report that strong colonies in full sunlight resist beetles far better than weak colonies in shade. Sunlight raises hive temperature to levels beetles dislike, and strong colonies can corral and contain adult beetles in propolis prisons. Ventilation also helps, because beetles thrive in humid conditions.
Wax Moths (Galleria mellonella)
Greater wax moths are primarily a problem for stored equipment and weak colonies. Their larvae tunnel through wax comb, leaving silken webbing trails and damaging drawn comb that took your bees significant effort to build. A strong colony will eject wax moth larvae, so their presence inside a living hive usually signals a colony already in trouble.
Wax moth prevention focuses on protecting stored supers and frames. Freeze drawn comb for 48 hours before storing to kill any eggs, store boxes in airtight containers or stacked with moth crystals (para-dichlorobenzene, never naphthalene), and never leave comb exposed where moths can lay eggs. For a two hive apiary, proper storage of your extracted supers is manageable and worth the effort.
Tracheal Mites (Acarapis woodi)
Tracheal mites are microscopic parasites that live inside the breathing tubes of honey bees. They are less commonly diagnosed now than in decades past, partly because many modern bee stocks carry some resistance, but they can still cause problems in certain regions and seasons.
Symptoms are non-specific and include bees crawling on the ground unable to fly, disjointed wings held at odd angles, and large numbers of dead bees at the hive entrance in early spring. Because these symptoms overlap with other problems, tracheal mites are difficult to diagnose without microscopic dissection. If you suspect them, consult your local apiary inspector or extension service.
Nosema Disease (Nosema apis and Nosema ceranae)
Nosema is a microsporidian fungal infection of the bee gut that causes dysentery, shortened bee lifespans, and reduced colony buildup. The two species, Nosema apis and Nosema ceranae, present slightly differently, but both can seriously weaken a colony, particularly over winter and in early spring.
Signs include brown streaks of feces on the hive front or inside the boxes, bees defecating inside the hive rather than on cleansing flights, and slow spring buildup despite adequate stores. Nosema thrives in damp, poorly ventilated conditions and in colonies under nutritional stress. Treatment with fumagillin was once standard, but some beekeepers now focus on nutrition and ventilation, reserving chemical treatment for confirmed heavy infections.
Chalkbrood (Ascosphaera apis)
Chalkbrood is a fungal disease that affects developing brood. Infected larvae become mummified, turning hard and chalky white or grey-black. You will typically find these mummies on the hive floor or stuck in the entrance, and affected brood cells will have perforated cappings where bees have tried to remove the dead larvae.
Chalkbrood is usually a stress disease, meaning it appears when colonies are under pressure from poor ventilation, nutritional deficiency, or chilling. It often resolves on its own once conditions improve. In a two hive operation, improving airflow, requeening with more hygienic stock, and ensuring strong nutrition are usually enough to manage it without chemical intervention.
American Foulbrood and European Foulbrood
These two bacterial brood diseases are among the most serious threats in beekeeping. American Foulbrood (AFB) produces a distinctive foul smell, sunken and perforated brood cappings, and larvae that dry into a hard scale glued to the bottom of the cell. The classic rope test, inserting a stick into a suspect larva and pulling out a slimy thread up to an inch long, is strongly associated with AFB.
European Foulbrood (EFB) affects younger larvae, producing a yellowish, melted appearance rather than the brown ropiness of AFB. It is generally less devastating and sometimes resolves with requeening and improved nutrition.
If you suspect American Foulbrood, contact your state apiary inspector immediately. In many jurisdictions, AFB is a reportable disease, and infected equipment may need to be destroyed. This is one case where IPM does not mean handling it yourself with home remedies.
Monitoring Methods for a Two Hive Apiary
Monitoring is the heart of integrated pest management. Without regular data, you are guessing, and guessing kills colonies. The good news is that with only two hives, thorough monitoring takes minimal time and gives you a level of oversight that commercial beekeepers can only dream of.
Sugar Roll Test
The sugar roll test is a non-lethal method for estimating Varroa mite levels. You coat a sample of about 300 live bees in powdered sugar, which stimulates the mites to release their grip, then shake the sugar and dislodged mites through a screened jar lid onto a white surface. Count the mites and divide by the number of bees to get your infestation rate.
The sugar roll preserves the bees, which many beekeepers prefer. Its accuracy depends on technique, particularly getting a good coating of sugar and giving it time to work. Forum beekeepers note that consistency matters more than perfection, so pick a method and use it the same way each time so your numbers are comparable from test to test.
Alcohol Wash
The alcohol wash is considered the gold standard for accuracy in mite monitoring. You collect 300 bees from the brood nest in a jar, add rubbing alcohol, shake vigorously, and pour the liquid through a filter that catches the mites while the bees pass through. Count the mites and calculate your percentage.
The alcohol wash sacrifices the sampled bees, which some beekeepers dislike, but it gives the most consistent and reliable results. For a two hive apiary where you can afford to be precise, the alcohol wash is worth learning. The key is taking your sample from the brood nest where mites are most concentrated, not from the honey supers.
Sticky Boards and Natural Mite Drop
Sticky boards are corrugated or paper sheets coated in a sticky substance that you slide under your screened bottom board. Mites that naturally fall off bees, either through grooming or because they are dead or dying, land on the board and get counted after 24 to 72 hours.
Natural mite drop is less precise than an alcohol wash because it does not tell you how many mites are on the bees directly. However, it is completely non-invasive and excellent for tracking trends over time. If your daily drop count is rising week over week, you know mite pressure is increasing regardless of the exact number.
Forum beekeepers have also noted that Freeman Beetle Traps, which sit under screened bottom boards to catch small hive beetles, also catch falling varroa mites. So a single device can give you data on two pest populations at once.
Inspection Frequency and the 3-3-3 Rule for Bees
How often should you inspect? The 3-3-3 rule is a helpful framework that many beekeepers use to structure their approach, and it comes up constantly in forums when beginners ask about inspection schedules.
The rule suggests waiting roughly three days after installing a package before your first inspection, allowing the queen time to settle and begin laying. Then inspect about every three weeks during the active season to track brood progress, check for queen cells, and assess stores. And allow at least three weeks, one full worker brood cycle, after any major intervention like requeening or treating before you evaluate results.
For monitoring specifically, I recommend a full mite count once a month during the active season, with sticky boards running continuously as a trend indicator. Before and after any treatment, always do a count so you know whether the treatment actually worked.
Economic Thresholds: When to Treat
The economic threshold is the pest level at which the cost of not treating exceeds the cost and risk of treating. For Varroa mites, the commonly cited threshold is around 3 mites per 100 bees (3 percent infestation) during the active season, though many experienced beekeepers now treat at lower levels to protect winter bees that must survive for months.
In late summer and early fall, when colonies are raising the long-lived winter bees that will carry the colony through to spring, the threshold should be even lower. Some researchers and experienced beekeepers recommend treatment at 2 percent or even 1 percent in August and September, because viruses transmitted by even low mite levels can shorten winter bee lifespans significantly.
The point of thresholds is to treat based on data, not fear. If your counts are consistently below threshold, your prevention and physical controls are working. If they are climbing, you have a clear signal to act before the situation becomes an emergency.
Record Keeping
With only two hives, record keeping is simple but absolutely essential. For each hive, track every inspection date, mite count results, treatments applied and when, brood pattern observations, queen status, and honey production. A notebook, spreadsheet, or beekeeping app all work fine.
Records let you spot trends that no single inspection would reveal. If Hive A consistently shows higher mite counts than Hive B despite identical management, you may want to requeen Hive A with more resistant stock. If a treatment did not reduce mite levels as expected, your records tell you to try a different approach next time. Patterns only become visible when you write things down.
Control Strategies: From Prevention to Treatment
When monitoring shows you need to act, the IPM hierarchy tells you to start with the least disruptive effective method. Here is a practical guide to the control strategies available for a two hive apiary, organized from gentlest to most aggressive.
Physical and Mechanical Controls
Screened bottom boards are one of the simplest and most effective physical controls. They allow mites that fall off bees during grooming to drop completely out of the hive rather than climbing back up. Studies suggest screened bottoms can reduce mite populations by 10 to 20 percent on their own, with no chemicals involved.
Drone brood removal exploits Varroa biology. Because mites strongly prefer to reproduce in the larger drone cells, providing a frame of drone foundation gives you a mite trap. Once the drones are capped and full of reproducing mites, you remove the frame and freeze it, killing the mites inside. Forum beekeepers consistently report that combining drone brood removal with other treatments produces noticeably better mite control than either method alone.
Entrance reducers help colonies defend against small hive beetles and robbing pressure, especially during dearths or when colonies are temporarily weakened after treatment. Beetle traps, including oil-filled traps that sit under the bottom board or between frames, can capture adult beetles before they reproduce.
Biological Controls and Genetic Selection
The most powerful biological control is selecting bees that naturally resist pests. Varroa Sensitive Hygiene (VSH) bees can detect and remove mite-infested pupae from capped cells, interrupting the mite reproductive cycle. Russian bees, descended from populations that survived Varroa for decades without treatment, also show strong natural resistance.
Bees with strong general hygienic behavior will also detect and remove larvae killed by chalkbrood and foulbrood, slowing the spread of disease. If one of your two hives consistently maintains lower mite levels on its own, that colony has genetics worth propagating. Consider raising queens from your best-performing colony rather than always buying from outside.
Beneficial nematodes applied to the soil around your hive stands can parasitize small hive beetle larvae when they leave the hive to pupate in the ground. This approach is gaining traction among beekeepers in beetle-prone regions and fits naturally into an IPM approach.
Chemical Controls: Organic and Synthetic Options
When physical and biological controls are not enough and monitoring confirms mite levels above threshold, chemical treatment becomes necessary. The IPM approach is not anti-chemical. It is anti-indiscriminate-chemical. Here are the main options.
Oxalic acid is highly effective when colonies are broodless, typically in late fall or winter, because it only kills phoretic mites on adult bees and cannot penetrate capped cells. It can be applied as a vapor or a trickle (dribble) solution. Many beekeepers use it as a winter cleanup treatment to start the season with low mite levels.
Formic acid is one of the few treatments that can penetrate capped brood and kill reproducing mites. It is effective during the active season when brood is present, but it is temperature-sensitive. Applied when it is too hot, it can kill bees and even the queen. Read the label carefully and follow temperature restrictions.
Thymol-based treatments use the active compound from thyme essential oil. They are effective against Varroa and are generally considered organic-approved, though they can leave a residue that affects honey flavor if applied too close to a honey flow. Essential oil blends and other plant-derived treatments appeal to beekeepers pursuing organic management, though their efficacy varies.
Synthetic miticides like amitraz are effective and widely used, but they carry the highest resistance risk. If you use synthetic treatments, rotate active ingredients between seasons and never rely on the same chemical year after year. Resistance develops when pest populations are exposed to the same mode of action repeatedly.
Treatment Timing and Rotation
Treatment timing is as important as treatment choice. The most critical window in the beekeeping year is late summer, when colonies are raising winter bees. If mite levels are high during this period, the winter bees will carry virus loads that shorten their lives and doom the colony before spring. Treat aggressively enough to get mites down before winter bee production peaks.
Rotate treatments between active ingredients to slow resistance development. A common rotation might be formic acid in late summer, oxalic acid in winter when broodless, and a different class entirely the following year if treatment is needed. Your records will help you track what you used and when.
Never apply chemical treatments while honey supers are on the hive if you intend to harvest that honey, unless the product label specifically permits it during a honey flow. Contaminated honey is both a health risk and a violation of food safety standards.
Two Hive Specific Strategies
Managing two hives is different from managing ten, and different again from running a single hive. The strategies below address what makes a two hive apiary unique and how to leverage its scale.
The Advantage of Attention
With two hives, you can inspect thoroughly and often without it becoming a chore. Use this. Commercial beekeepers with hundreds of hives may see each colony a handful of times per season. You can look at yours weekly if needed, monitor mites monthly with proper tests, and catch problems while they are still small and easily managed. This level of attention is your greatest asset.
Preventing Cross-Contamination
Two hives means two potential sources of infection, and it is easy to spread disease between them on your hands and tools. Always inspect your stronger, healthier hive first and your weaker or suspect hive last. If you suspect disease in one hive, wash your hands, change gloves, and sterilize your hive tool between hives. Never move brood or frames from a sick hive to a healthy one.
Robbing is another cross-contamination risk. When one hive is weak or being treated, strong bees from the other may rob its honey and spread mites and disease in the process. Entrance reducers on the weaker hive during vulnerable periods help prevent this.
A Seasonal Framework for Two Hives
Here is a simplified seasonal IPM calendar adapted for a small operation. In early spring, do your first mite count as soon as bees are flying regularly, check stores and brood pattern, and treat only if levels are elevated. In late spring through summer, monitor monthly, maintain physical controls, and harvest honey. In late summer, treat to protect winter bees, monitoring before and after. In fall and winter, do a final oxalic acid treatment when broodless, reduce entrances, and ensure adequate stores and ventilation for winter.
Community Coordination
If you have neighboring beekeepers within foraging range, coordinate treatment timing. When surrounding colonies carry high mite loads, drifting and robbing bees can constantly reinfest your hives no matter how well you manage them. Local beekeeping clubs are the best source of information on regional treatment timing, disease pressures, and which approaches work in your climate.
Forum beekeepers consistently emphasize that peer recommendations, especially from experienced members of your local club, are among the most trusted sources of practical IPM guidance. What works in a humid Gulf Coast climate may fail in a dry mountain valley, and local knowledge bridges that gap.
FAQs
What are the 5 components of integrated pest management?
The five components are prevention and cultural practices, monitoring and identification, physical and mechanical controls, biological controls, and chemical controls. They form a hierarchy where you exhaust lower-level options, like resistant genetics and drone brood removal, before escalating to chemical treatments.
What is the 3 3 3 rule for bees?
The 3-3-3 rule suggests waiting about three days after installing a package before your first inspection, inspecting roughly every three weeks during the active season, and allowing about three weeks (one full worker brood cycle) after a major intervention like requeening or treating before you evaluate results.
What are the three basic rules of an integrated pest management program?
The three basic rules are: prevent pest problems before they start through good management and resistant genetics, monitor regularly and identify problems accurately using tools like mite counts, and use the least disruptive effective control first, escalating only when necessary.
What are the 6 steps of an IPM program?
The six steps are: identify potential pests and diseases, monitor pest populations regularly, establish economic action thresholds, choose prevention strategies first, apply the least-disruptive effective controls when thresholds are exceeded, and evaluate results to refine your approach for next time.
Conclusion
Building an integrated pest management plan for a two hive apiary comes down to a few core habits. Prevent problems with good genetics, good nutrition, and good hive siting. Monitor regularly so you know exactly what is happening in your colonies. Act with the least disruptive effective method, and escalate only when data tells you to.
Your two hive setup gives you an advantage that larger operations cannot match: attention. Use it. Test mites monthly, keep honest records, coordinate with your local beekeeping community, and treat based on thresholds rather than the calendar.
If you put this framework into practice this season, you will be managing your apiary the way the most successful beekeepers do, proactively and intelligently. Your bees will be healthier, your honey will be cleaner, and your colonies will have the best possible chance of thriving year after year.