
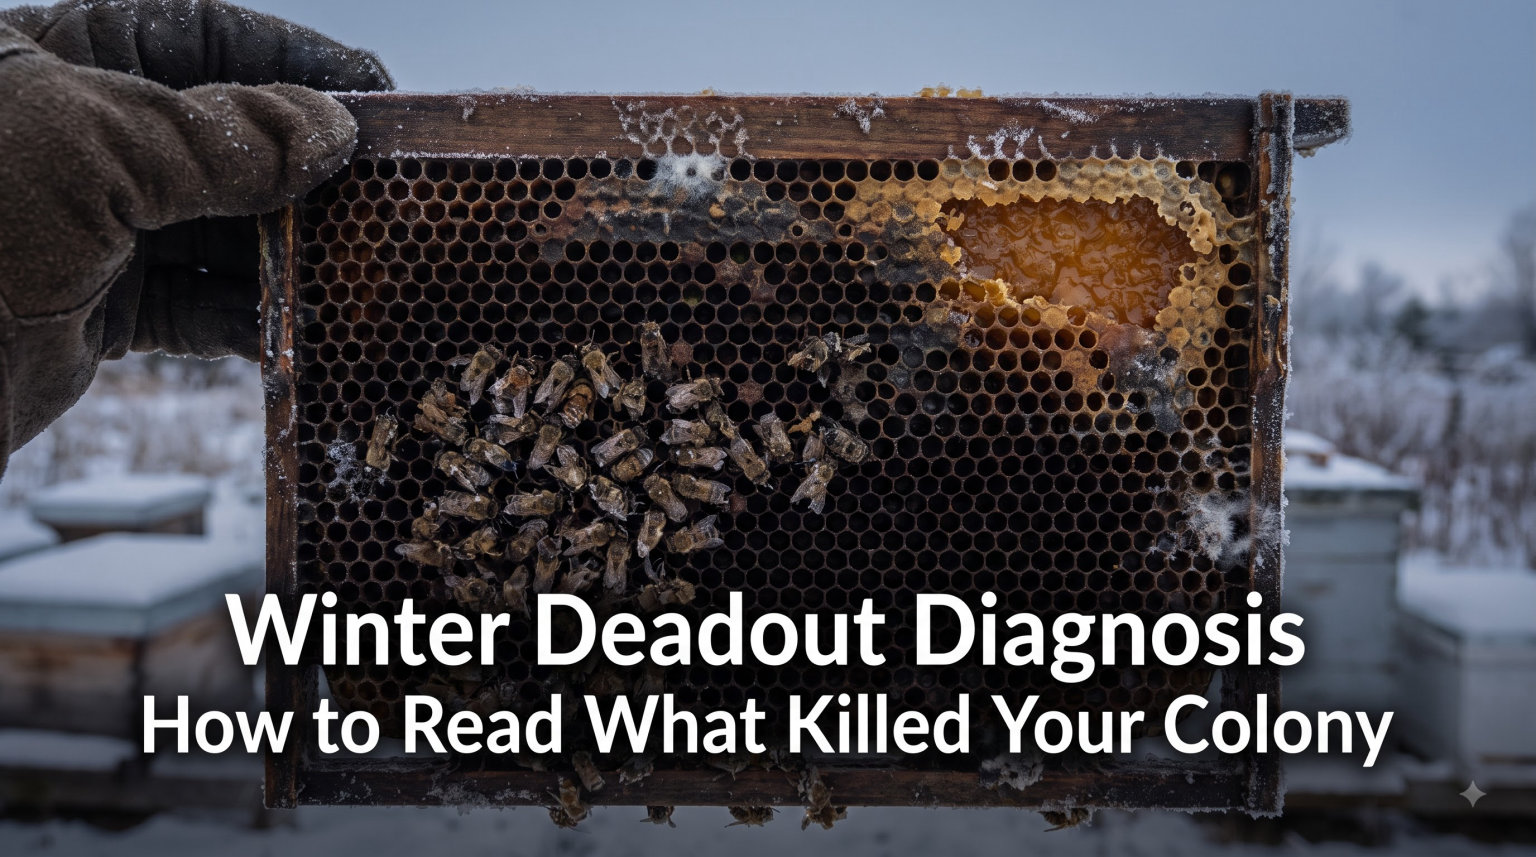
I lost my first colony to a silent killer in February 2026, and the worst part was not knowing what went wrong. The hive looked fine the previous fall, the honey stores were adequate, and when I opened the box in spring all I found was a pile of dead bees on the bottom board with no obvious answer. That mystery is exactly why winter deadout diagnosis matters. When a bee colony dies over winter, the hive itself tells a story if you know how to read it.
Winter deadout diagnosis is the systematic process of examining a dead colony to determine whether starvation, varroa mites, disease, moisture, or equipment failure caused the loss. Learning this skill transforms a frustrating loss into a teachable moment, and it directly improves the survival odds of your surviving hives. In this guide, I will walk you through the same four-step hive autopsy I now use on every deadout, and I will show you the tell-tale signs of the four most common killers.
Table of Contents
Why Winter Deadout Diagnosis Matters Before Spring
Winter deadout diagnosis matters because the cause of death determines what you do next. If your bees died from American Foulbrood, you must burn the equipment. If they starved, you need to rethink fall feeding. If they died from varroa mites, your surviving hives likely face the same pressure and need immediate treatment. Skipping the autopsy means you lose the only feedback loop that actually improves your overwintering success rate.
A proper hive autopsy takes 20 to 30 minutes and costs nothing. The information you gain is worth far more than the time invested, because colony losses are expensive when you factor in replacement bees, queens, drawn comb, and a lost season of honey production. More importantly, several causes of winter kill are contagious. Diagnosing early protects your other colonies from the same fate.
Step 1: External Examination of the Hive
The external examination of the hive is your first diagnostic step, and it begins before you crack open any boxes. Walk up to the deadout slowly and observe the entrance area, the landing board, and the ground in front of the hive. These surface clues often narrow down the cause of death before you ever lift a frame.
Reading the Entrance and Landing Board
A small pile of dead bees on the landing board in winter is normal. Bees undertake their dead throughout the cold months when they can manage short cleansing flights. However, a large drift of dead bees piled against the entrance reducer or scattered across the snow points to something different. A massive pile often indicates the colony tried to break cluster during a warm spell and got caught out when temperatures dropped again.
Look for these external clues as you read the entrance:
No dead bees at all with the entrance open: the colony may have absconded, or it died weeks ago and the undertakers cleared out.
A drift of two inches or more of dead bees on the landing board: possible sudden cold snap or pesticide exposure.
Bees with their tongues sticking out at the entrance: a classic sign of starvation, though it can also occur with poisoning.
Chewed or scratched wood at the entrance: rodent damage from mice that nested inside the hive.
Yellow or brown stains running down the front of the hive: dysentery from Nosema or other intestinal issues.
White mummies on the landing board or ground: chalkbrood infection.
Lifting the Hive for Weight and Stability
Tip the hive slightly from the back to gauge how much honey is left. A deadout that feels heavy still has substantial stores, which rules out simple starvation. A deadout that feels light tells you the bees ran out of fuel. Note the weight estimate in your records so you can compare it to your fall weight and verify whether the cluster consumed the expected amount of winter stores.
Step 2: Reading the Bottom Board Debris
The bottom board debris is the most informative surface in a winter deadout diagnosis. Remove the entrance reducer and any bottom board debris that has accumulated over winter. This material is not waste, it is a diary of what happened inside the hive over the past three months.
What Normal Debris Looks Like
Normal bottom board debris includes small flakes of wax cappings, an occasional dead bee or two, and a light dusting of pollen and propolis fragments. Anything beyond this baseline tells you something specific. Put the debris on a tray or into a container so you can sort through it carefully under good light.
Red Flags in Bottom Board Material
Sort through the debris and look for these specific warning signs:
Wax dust or “snowdrift” of beeswax particles: indicates significant chewing activity, often from wax moth larvae or mice that took up residence after the cluster died.
White Webbing or tunnels in cappings: wax moth infestation, which usually sets in after the cluster dies and the wax becomes unprotected.
Reddish-brown “spit” spots on the board: dysentery staining from Nosema or other intestinal disorders.
Small reddish-brown oval specks about 1.5 mm wide: varroa mite bodies that have dropped off the bees. A dozen or more is significant.
Mouse nest material: shredded paper, grass, or fabric and a strong musky smell. Mice destroy comb and can wipe out a colony.
Wet, soggy debris with a musty smell: condensation problems, often paired with a moldy cluster above.
Step 3: Inner Cover and Frame Top Inspection
The inner cover and frame tops reveal moisture and disease clues that the bottom board cannot. Pry off the outer cover and lift the inner cover carefully. Turn it over and inspect the underside. Peek at the tops of the frames before pulling any of them out. This three-minute step often gives you the answer before you disturb the cluster.
Moisture Marks on the Inner Cover
A moisture-soaked inner cover with black mold spots tells you the hive had a serious condensation problem. Bees can handle cold as long as they stay dry, but ice-cold water dripping onto the cluster is lethal. Look for water stains, fuzzy white or black mold, and warped or rotting wood around the inner cover edges. Heavy moisture problems correlate with poor upper ventilation and inadequate insulation above the cluster.
What the Frame Tops Reveal
Look across the tops of the frames for:
Mold patterns and discoloration: localized mold on a few frames points to a small leak or moisture pocket. Widespread mold signals a chronic ventilation problem.
Beeswax cappings chewed and stuck to the top bars: rodent activity inside the hive.
Small white “mummy” shapes on top of the frames: a heavy chalkbrood presence, which usually indicates a weak or stressed colony that could not keep the brood warm.
Shiny, varnished propolis crusts: an indicator of a hard-working but otherwise normal colony, useful as a baseline.
Excessive drone brood remnants: a failing queen that laid unfertilized eggs going into winter.
Step 4: Cluster Position Analysis
The cluster position is the single most important clue in winter deadout diagnosis. Where the bees died and how they are arranged tells you almost everything about why they died. Gently pull the top frames one at a time and locate the cluster. Do not try to disassemble the cluster yet. Just observe where it is and how it died.
Reading the Cluster Location
A cluster that died in the upper portion of the hive with empty cells directly below and honey frames beside it is the textbook signature of starvation. The bees moved upward following their food supply, but the cluster was too small or too cold to break sideways to reach the capped honey just inches away. This is the classic “head-in-cells” pattern.
A cluster that died in the lower portion of the hive, in a small ball, with abundant honey stores above it, points to a different story. The bees may have been too weak to move up, possibly because of varroa infestation, disease, or an aging queen that produced a small winter cluster.
A cluster that died directly on the front wall or back wall of the hive, with no food within reach, indicates the colony was starving while trapped in a position where it could not relocate. This is common in late-winter deadouts when the cluster has used the last of its accessible honey.
How the Bees Are Arranged
Look at how the dead bees are positioned within the cluster:
Head-down in cells: the textbook sign of starvation. Bees insert their heads into empty cells as they die, often with their abdomens sticking out.
Loose and scattered with no center: indicates the cluster died over a longer period, often from a chronic disease like Nosema.
Tightly packed with a small footprint: usually a small, weak cluster that ran out of heat production capacity.
Damp, moldy, or stuck together: condensation death, where water dripped onto the cluster and chilled the bees faster than they could warm themselves.
Cause 1: Starvation – The Classic Bee Autopsy Finding
Starvation is the most common cause of winter deadouts in beginner colonies and one of the easiest to diagnose. The classic sign of starvation is a cluster of dead bees with their heads buried in empty cells, with honey stores just one or two inches away on adjacent frames. The bees simply could not reach the food they had.
Verify the starvation diagnosis by inspecting the remaining frames. If you find capped honey within the cluster’s reach but unused, the colony likely died of starvation rather than disease. The cluster was too small to generate enough heat to move laterally into the honey frame, or the cold spell was so extended that the bees could not break cluster to cross even a few inches of empty comb.
Starvation is preventable in future seasons by ensuring each colony enters winter with at least 60 to 80 pounds of honey stores in the correct position, feeding sugar syrup or fondant in late fall if stores are short, and placing the largest stores overhead so the cluster naturally moves upward toward the food.
Cause 2: Varroa Mite Damage and Associated Viruses
Varroa destructor is the single largest cause of overwintering losses in managed honey bee colonies worldwide. Mites feed on bee fat body tissue, vector dangerous viruses like Deformed Wing Virus, and weaken bees to the point that the winter cluster cannot sustain itself. Diagnosing mite damage in a deadout requires looking for specific indicators on the bees, on the bottom board, and in the comb.
Mite Damage Indicators
Look for these signs of varroa involvement in a deadout:
Reddish-brown oval mites on dead bees or on the bottom board: a heavy mite load close to death. A few mites are normal, dozens are not.
Bees with deformed wings or shriveled abdomens: classic Deformed Wing Virus symptom, which strongly indicates a high mite load.
Spotty brood pattern in remaining capped cells: indicates that the colony was already declining before it died.
Parasitic Mite Syndrome (PMS): a combination of symptoms including bald brood, chewed pupae, and a general “sick” appearance to the remaining bees.
Small, weak cluster that ran out of food despite adequate stores: a heavily mite-infested cluster cannot maintain the metabolic heat needed to access honey.
To confirm a mite diagnosis, you can sample 300 bees from the dead cluster in a jar of soapy water or alcohol and shake them to dislodge the mites. A count of more than 9 mites per 300 bees in late fall indicates a colony that was in serious trouble going into winter.
Cause 3: Disease – AFB, Nosema, and Chalkbrood
Disease is the cause every beekeeper dreads because some diseases are highly contagious and require the destruction of equipment. Identifying disease in a deadout protects your other colonies and prevents you from spreading contamination through normal beekeeping practices.
American Foulbrood (AFB)
American Foulbrood is the most serious bee disease and is caused by the spore-forming bacterium Paenibacillus larvae. AFB spores can survive for decades in equipment, which is why most regulatory agencies require burning infected hives. Identify AFB by looking for:
Sunken, perforated, or discolored cappings on capped brood cells.
Brown, ropy larvae that stretch more than an inch when a toothpick is inserted and slowly withdrawn.
Scaly, black remains at the bottom of cells that are hard to remove.
A sour, glue-like smell from the hive.
If you suspect AFB, contact your state bee inspector immediately. Do not move the equipment, do not give the honey to another colony, and prepare to burn the hive bodies, frames, and bees. Honey from a suspected AFB hive is not safe to feed to other bees.
Nosema
Nosema is a fungal infection of the bee gut caused by either Nosema apis or Nosema ceranae. Symptoms include dysentery streaking on the front of the hive, bees crawling on the ground in front of the entrance, and weak spring buildup. To diagnose Nosema definitively you need a microscope and a sample of bee gut tissue, but the visual signs and the cluster pattern are strong indicators.
Chalkbrood
Chalkbrood is caused by the fungus Ascosphaera apis and produces the white, mummy-like dead larvae that give the disease its name. A few chalkbrood mummies are normal and are usually cleaned out by the colony. Heavy chalkbrood in a deadout, with mummies littering the bottom board and frame tops, indicates a chronically weak colony that was probably already compromised by mites or poor nutrition.
Cause 4: Condensation and Poor Ventilation
Condensation is the silent killer of otherwise healthy winter colonies. Bees can generate enough metabolic heat to keep the inside of their cluster at 90 degrees Fahrenheit even when the outside air is far below freezing. However, that heat rises and meets the cold inner cover, where it condenses into water. When that water drips back down onto the cluster, the bees get chilled and die.
Ventilation Failure Signs
A condensation death leaves a distinctive signature:
Wet, soggy, moldy cluster: bees blackened with mold and stuck together in clumps.
Water staining on the inner cover and top bars: often with green, white, or black mold growth.
Wet, smelly bottom board debris: mushy rather than dry, with a strong musty odor.
Frames warped or rotting at the top from chronic moisture exposure.
Honey stores crystallized or fermented: a sign that moisture migrated into the honey supers.
Moisture-related deaths are preventable by providing an upper entrance, a quilt box with absorbent material above the inner cover, or a slatted rack below the bottom brood box to improve air circulation. The diagnosis here is straightforward, and the fix is even more straightforward.
What to Do With Equipment After a Deadout
Equipment reuse after a deadout depends entirely on the cause of death. If the colony died from starvation, mites, or condensation, the equipment is safe to reuse after a quick inspection and minor cleaning. If the colony died from American Foulbrood, the equipment must be burned. If the colony died from chalkbrood or Nosema, the equipment can be reused but should be scoured with a bleach solution and exposed to sunlight for a few days.
Always remove the dead bees from the bottom board, scrape off any debris, and store drawn comb in a dry, ventilated space. Wax moths will attack unprotected comb within weeks once the colony is gone, so freeze the frames for 24 hours if you cannot reuse them immediately. Healthy drawn comb is one of the most valuable assets in your apiary, so protect it.
FAQs
What is the 3 3 3 rule for bees?
The 3 3 3 rule for bees is a simple wintering guideline meaning each colony should have about 3 pounds of bees (roughly 10,000 bees), 3 deep frames of honey, and 3 inches of insulation above the inner cover or, in some versions, 3 pounds of sugar feeding if stores run short. It is a quick reference for minimum winter survival needs, not a guarantee.
Is it normal to have dead bees outside the hive in winter?
Yes, a small number of dead bees on the landing board or in the snow in front of the hive is normal during winter. Bees undertake their dead throughout the cold months during brief cleansing flights. A massive drift of dead bees, however, is not normal and may indicate a sudden cold snap, starvation, or pesticide exposure.
How do I know if varroa mites killed my colony?
You can confirm varroa as a cause of death by looking for reddish-brown mites on dead bees and on the bottom board, bees with deformed wings from Deformed Wing Virus, a small cluster that ran out of food despite adequate stores, and a spotty brood pattern. A definitive test is to wash 300 bees in alcohol or soapy water and count the dislodged mites. More than 9 mites per 300 bees in fall indicates a colony that was in serious trouble going into winter.
Can I reuse equipment from a dead hive?
Equipment reuse depends on the cause of death. Hives that died from starvation, varroa, or condensation can be reused after cleaning. Equipment from American Foulbrood hives must be burned because the spores survive for decades. Equipment from chalkbrood or Nosema hives can be reused after scouring with a bleach solution and airing in sunlight. Always remove dead bees, scrape debris, and freeze frames if you cannot reuse them right away to prevent wax moth damage.
How cold is too cold for bees to survive?
Healthy honey bee colonies can survive temperatures well below freezing as long as the cluster stays dry and has enough food. Bees generate metabolic heat that keeps the cluster interior around 90 degrees Fahrenheit even when outside air is far below zero. The real danger is not cold itself but condensation dripping onto the cluster, starvation, or mite-weakened bees that cannot generate enough heat. A dry, well-fed cluster of healthy bees can survive extreme cold snaps.
Final Thoughts on Reading Your Deadout
Winter deadout diagnosis is one of the most valuable skills a beekeeper can develop. Every deadout tells you something, and the hive is not shy about leaving evidence. Walk through the four steps – external examination, bottom board reading, inner cover inspection, and cluster position analysis – in order, and you will reach a clear conclusion in almost every case. The cause you find determines your next move, from corrective treatment on surviving colonies to burning an AFB-infected hive entirely. Do the work now, and your next winter will be quieter than the last one.