
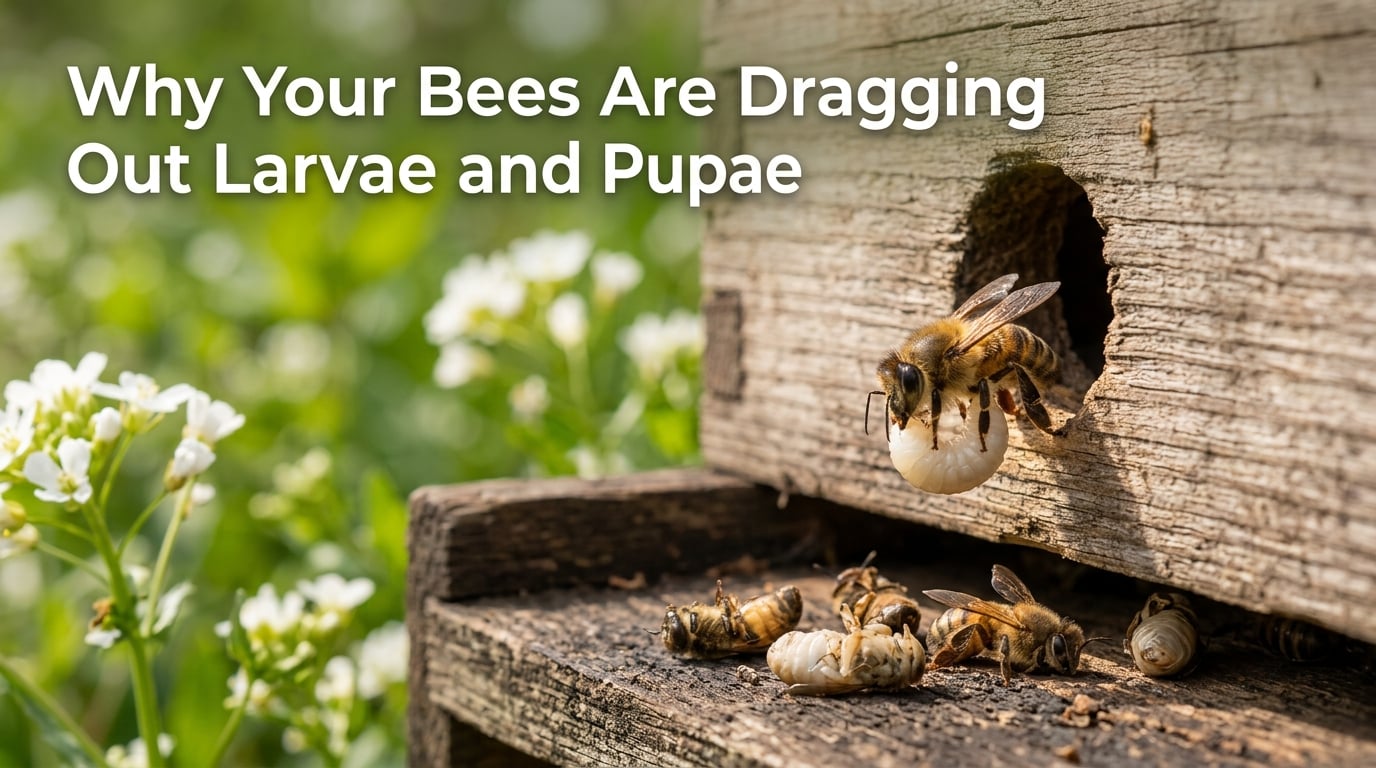
Walking up to your hive and spotting larvae or pupae being dragged out the front entrance is one of the most unsettling sights in beekeeping. I remember the first time I saw it myself, my heart sank. I immediately assumed the worst. But after years of working with colonies, I learned that bees dragging out larvae and pupae is not always a death sentence. In fact, it is often a sign that your colony is fighting back against a threat.
The behavior itself is called hygienic behavior, and it is one of the most important survival mechanisms a honey bee colony possesses. Worker bees constantly inspect brood cells and remove any larvae or pupae that are dead, diseased, or infested with pests. This self-preservation instinct protects the rest of the colony from spreading infection.
That said, the frequency and volume of larvae removal tells you a lot about what is happening inside. A few pupae on the landing board might be normal spring housekeeping. Hundreds of larvae being hauled out signals a serious problem that needs your attention. In this guide, I will walk you through every major cause, how to tell them apart, and exactly what to do about each one.
Table of Contents
Why Your Bees Are Dragging Out Larvae and Pupae
Bees drag out larvae and pupae when something is wrong with those individual bees inside their cells. The colony functions as a superorganism, and removing compromised brood is its immune response. Worker bees can detect chemical changes in a cell that signal a dead or dying larva long before you would notice anything from the outside.
Once a problem is detected, bees uncap the affected cell and physically remove the larva or pupa. They discard it out the front entrance, which is why you find these telltale signs on your landing board. The key question is not whether removal is happening, but rather why it is happening.
Understanding the distinction between normal housekeeping and a crisis comes down to volume, timing, and what the removed larvae look like. A healthy colony might remove a handful of brood each day as part of routine maintenance. When you see dozens or hundreds being removed, or when the pattern continues for days, it is time to investigate.
Common Causes of Larvae and Pupae Removal
After analyzing forums, consulting experienced beekeepers, and working through hundreds of hive inspections, I have identified six main reasons your bees might be removing brood. Let me break down each cause with the specific symptoms that help you identify it.
1. Varroa Mites and Associated Viruses
Varroa destructor is the single biggest threat to honey bee colonies worldwide, and it is the most common reason bees remove pupae. When Varroa mites reproduce inside capped brood cells, they feed on the developing pupa and transmit viruses in the process. The most damaging of these is deformed wing virus, which causes pupae to emerge with shriveled, useless wings.
Bees can sense when a pupa is compromised by mite reproduction or viral infection. On the Beesource forums, experienced beekeepers consistently report that Varroa is the most likely culprit when you see pupae being dragged out. The bees are doing exactly what they should be doing by removing infested individuals.
The problem is that when Varroa levels are high, the colony cannot keep up. Too many pupae are being damaged, and the removal behavior becomes constant. This is why monitoring your mite count is non-negotiable. Use an alcohol wash or sugar roll test to measure mite levels. If you find more than 2 to 3 mites per 100 bees, treatment is urgent.
Signs that Varroa is driving the removal include pupae with deformed wings being discarded, a spotty brood pattern with empty cells scattered among capped brood, and bees with shortened abdomens or deformed wings crawling near the entrance. You may also see visible mites on adult bees, though by that point the infestation is already severe.
2. Chalkbrood Fungal Infection
Chalkbrood, caused by the fungus Ascosphaera apis, is one of the most visually distinctive causes of larvae removal. On the Honeyflow forum, beekeepers consistently identify chalkbrood as the main reason bees remove young pupae, especially in new or recently established hives. The fungus infects larvae and mummifies them, turning them into hard, chalk-like structures.
If your bees are dragging out larvae that look like small white, gray, or black mummies, chalkbrood is almost certainly the cause. These mummies are easy to spot on the ground in front of the hive. They are dry, lightweight, and feel like tiny pieces of chalk when you pick them up.
Chalkbrood thrives in cool, damp conditions and often appears during wet spring weather or when ventilation is poor. The good news is that chalkbrood is rarely fatal to an otherwise healthy colony. Improving ventilation, requeening with resistant genetics, and reducing moisture in the hive usually resolves the problem over time. If the infection is caught early, the pupae may not have hardened yet, which is why the bees remove them while they are still soft.
3. American and European Foulbrood
Bacterial brood diseases are among the most serious diagnoses a beekeeper can face. European foulbrood (EFB) attacks larvae before they are capped, causing them to die in a twisted, yellowish-brown mass. On the Beemaster forum, beekeepers report that colonies can sometimes handle EFB on their own through their cleaning behavior, though intervention is often still needed.
American foulbrood (AFB) is far more dangerous. It kills larvae after they are capped, turning them into a sticky, brown, ropy substance with a distinctive foul odor. The classic diagnostic test is the matchstick test: insert a stick into a suspected cell, slowly pull it out, and if the contents stretch into a long rope of about 2 to 3 centimeters, AFB is likely present.
If you suspect AFB, contact your local apiary inspector immediately. In many regions, AFB requires the colony and equipment to be destroyed because the spores can persist for decades. Do not attempt to treat AFB on your own. EFB, by contrast, can sometimes be managed by requeening, improving nutrition, and reducing colony stress.
4. Starvation and Resource Depletion
When a colony runs low on stored honey and incoming nectar, bees face an impossible choice. They cannot feed larvae they cannot support, so they make the difficult decision to remove them. As TheBeeSupply blog explains, a starving hive will cannibalize or pull out larvae and pupae if they cannot feed them, especially during winter or a nectar dearth.
Starvation-driven removal is common in late winter and early spring when stores are depleted but nectar flows have not begun. It also happens during summer dearths when the nectar flow stops unexpectedly. You will notice bees removing larvae of all ages, not just pupae, and the colony may seem agitated or less active than normal.
The fix for starvation is emergency feeding. If bees are actively removing larvae due to lack of food, give them sugar syrup immediately (1:1 ratio in spring and summer, 2:1 in fall). You can also place a pollen patty inside the hive to provide protein. Check the weight of your hives by lifting the back, and feed proactively before starvation sets in.
5. Chilled Brood and Temperature Stress
Honey bee brood must be maintained at approximately 95 degrees Fahrenheit (35 degrees Celsius) to develop properly. If the brood nest temperature drops significantly, the developing larvae and pupae can die from cold. The bees then remove the dead brood in a cleanup effort.
Chilled brood most commonly occurs during unexpected cold snaps in early spring. A colony that is too small to maintain the proper temperature across the brood nest is especially vulnerable. If you open a hive during cold weather and leave it open too long, you can also chill the brood yourself through improper inspection timing.
Signs of chilled brood include dead larvae in various stages being removed all at once after a cold night. The pattern may be concentrated on the outer edges of the brood nest where it is coldest. To prevent this, avoid opening hives when temperatures are below 55 degrees Fahrenheit, and do not expand the brood nest faster than the colony’s population can keep warm.
6. Pesticide Poisoning
Agricultural pesticide exposure can cause acute brood mortality, leading bees to remove large numbers of dead larvae and pupae. If your hive is located near farms or orchards that have been recently sprayed, pesticide poisoning is a real possibility.
The signs differ from disease-related removal. You may see large numbers of dead adult bees at the entrance alongside the removed brood. Larvae may appear discolored or stunted. Pesticide kills often happen suddenly, with many bees dying within a short period rather than the gradual increase seen with disease.
If you suspect pesticide poisoning, contact neighboring farmers to learn their spray schedules and ask them to notify you before applications. You can close your hives during spraying events and cover them with damp burlap to keep bees inside. Providing clean water sources away from treated fields also helps reduce exposure.
Queen Failure: The Hidden Culprit
None of the top-ranking articles on this topic cover queen failure as a cause of larvae removal, but it is a significant factor that beekeepers on Reddit frequently report. When a queen is failing, running out of sperm, or has been lost entirely, the colony cannot maintain a healthy brood nest.
A failing queen may lay unfertilized eggs that develop into drones in worker cells. These drone larvae are eventually recognized as incorrect and removed by the bees. You might see a spotty brood pattern with too many drone cells, elevated bullet-shaped cappings scattered among normal worker brood.
If the queen has died and the colony failed to raise a replacement, you will see no new eggs and the remaining brood will age out. Workers may start laying their own unfertilized (drone) eggs, producing multiple eggs per cell with no pattern. The colony removes these inappropriate larvae as well. If you suspect queen failure, inspect for eggs and a solid laying pattern. Requeening is the only solution if the queen is truly gone or non-functional.
Is Larvae Removal Always a Problem? Understanding Hygienic Behavior
Here is something that surprised me when I first learned it: larvae removal can actually be a positive sign. Colonies that aggressively remove diseased and mite-infested brood are displaying what researchers call Varroa Sensitive Hygiene (VSH). These colonies detect and remove pupae infested with Varroa before the mites can reproduce, which naturally suppresses mite populations.
Bee breeders actively select for VSH traits because these colonies need fewer chemical treatments. If you see a moderate amount of brood being removed and your mite counts stay low, your bees may simply have excellent hygiene. The HonestBee article makes this point well, and I agree. Do not panic at the sight of every discarded larva. Instead, use it as a diagnostic signal.
The key distinction is scale and pattern. A few larvae removed during spring buildup is normal. Consistent, heavy removal combined with a spotty brood pattern, mummies, foul odors, or high mite counts is a red flag that demands action.
How to Diagnose the Cause: A Step-by-Step Guide
No competitor offers a systematic diagnosis process, so I built one based on symptoms you can observe during a single hive inspection. Follow these steps in order.
Step 1: Examine the removed larvae at the entrance. Look closely at what the bees are dragging out. If you see hard, white or black mummies, chalkbrood is your answer. If you see pupae with deformed wings, Varroa and associated viruses are likely. Normal-looking larvae of various ages suggest starvation or chilled brood.
Step 2: Open the hive and check the brood pattern. A solid, tight pattern of capped brood indicates a healthy queen and colony. A spotty brood pattern with scattered empty cells points to Varroa, disease, or queen failure. Too many drone cells in worker comb suggests a failing queen.
Step 3: Perform the matchstick test. Pick a sunken, discolored, or perforated capped cell and insert a matchstick or small stick. Pull it out slowly. If the contents rope out 2 to 3 centimeters, suspect American foulbrood and call your inspector immediately. If there is a sour smell and the larvae look twisted and yellowish, consider European foulbrood.
Step 4: Check for eggs and the queen’s laying pattern. Look for a single egg standing upright at the bottom of cells. If you see no eggs, multiple eggs per cell, or only drone brood, your queen may be failing, missing, or replaced by laying workers. This narrows your diagnosis to queen failure.
Step 5: Check food stores and colony weight. Lift the back of the hive. If it feels alarmingly light and you see no capped honey in the upper boxes, starvation is your cause. Confirm by checking whether the removed larvae are of mixed ages, which is typical when bees cannibalize brood they cannot feed.
What to Do When You See Bees Dragging Out Larvae
Your response depends entirely on the diagnosis. Here are the action items for each cause.
For Varroa mites: Confirm with an alcohol wash or sugar roll test. If you exceed the treatment threshold, apply your chosen mite treatment immediately. Popular options include formic acid, oxalic acid, and thymol-based treatments. Re-test after treatment to confirm effectiveness.
For chalkbrood: Improve hive ventilation by propping the top or adding a screened bottom board. Reduce moisture sources around the hive. Consider requeening with a chalkbrood-resistant strain if the problem recurs each season.
For starvation: Feed sugar syrup at a 1:1 ratio immediately, and add a pollen patty for protein. Continue feeding until a natural nectar flow is established. Check stores weekly during high-risk periods.
For foulbrood: For EFB, requeen the colony, improve nutrition, and reduce stress. For suspected AFB, stop everything and contact your local apiary inspector. Do not move infected equipment to other apiaries.
For chilled brood: Reduce the entrance size, do not open the hive in cold weather, and avoid expanding the brood nest prematurely. Give the colony time to recover as temperatures warm.
For queen failure: Order a new queen from a reputable supplier and introduce her properly. If the colony is queenless, introduce a frame of open brood from another hive to give them material to build a new queen if requeening is not immediately possible.
Seasonal Timing: When to Worry Most
One thing no competitor covers is the significance of when you see larvae being removed. The season tells you a lot about the likely cause and how urgently you need to act.
In late winter and early spring, larvae removal most commonly signals starvation or chilled brood. Colonies are building up population and burning through stores fast. This is the most critical time for emergency feeding and for avoiding unnecessary inspections during cold snaps.
In late summer and early fall, heavy larvae removal often points to Varroa mites reaching peak levels. This is when virus transmission is highest and colonies are most vulnerable. If you see removal during this window, test for mites immediately and treat before winter bees are raised. Winter bees are the colony’s lifeline, and if they are damaged by viruses during development, the colony may not survive the cold months.
Prevention Strategies for 2026
The best treatment is prevention. Build an Integrated Pest Management (IPM) approach into your routine that keeps problems from reaching crisis levels.
Test for Varroa mites monthly during the active season and keep records. Treat proactively based on threshold levels rather than waiting for visible symptoms. Use screened bottom boards for ventilation and mite fall. Maintain clean equipment and never reuse old comb from unknown sources. Requeen annually or biannually with mite-resistant stock such as VSH or Minnesota Hygienic lines.
Monitor colony weight throughout winter and feed before starvation begins. Keep hives in locations with good air circulation and protection from prevailing winds. Communicate with neighboring farmers about spray schedules. These proactive steps dramatically reduce the chances of ever seeing emergency-level larvae removal.
FAQs
Why do bees remove dead pupae?
Bees remove dead pupae as part of their hygienic behavior, which is the colony’s natural immune response. Worker bees detect chemical changes inside capped cells that signal a dead or diseased pupa, then uncap the cell and remove it to prevent infection from spreading to healthy brood.
Why are my bees removing larvae from the hive?
Your bees are removing larvae because they detect a problem with those individuals, such as disease (chalkbrood or foulbrood), pest infestation (Varroa mites and associated viruses), starvation, chilled brood, pesticide exposure, or queen failure. The behavior itself is protective, but heavy or persistent removal signals an underlying issue that needs diagnosis.
How long do bees take to pupate?
Worker honey bees spend approximately 12 days in the larval stage before being capped, then another 12 days as a pupa under the capping before emerging as an adult bee. The total development time from egg to adult worker is about 21 days. Drones take roughly 24 days.
What naturally kills Varroa mites?
Natural methods that suppress Varroa mites include screened bottom boards that allow mites to fall out of the hive, brood breaks that interrupt mite reproduction, and selecting for Varroa Sensitive Hygiene (VSH) genetics where bees detect and remove infested pupae. Formic acid and oxalic acid are naturally derived treatments that effectively kill mites. Some beekeepers also use powdered sugar dusting to encourage grooming behavior.
What is the biggest killer of bees?
Varroa destructor mites and the viruses they transmit, particularly deformed wing virus, are widely considered the biggest killer of honey bee colonies worldwide. Mite infestation weakens the colony’s immune system and spreads lethal viruses that can lead to colony collapse, especially when combined with other stressors like poor nutrition and pesticide exposure.
Conclusion
Seeing your bees dragging out larvae and pupae is a diagnostic signal, not a verdict. Your colony is telling you something is wrong, and it is up to you to figure out what. Use the step-by-step diagnosis guide above to identify the cause, then take the specific action that matches your findings.
Remember that some removal is normal and even beneficial. Colonies with strong hygienic behavior are healthier in the long run because they actively suppress disease and mite levels. The danger comes when the volume of removal exceeds what the colony can handle, which points to an underlying problem that will not resolve itself.
Start with the simplest observations at the entrance, work through the diagnostic steps, and act with confidence. The sooner you identify the cause, the better your chances of saving the colony and heading into the next season strong.